Call4Tel E1 Gateway is used to connect ISDN (PRI / BRI) lines.
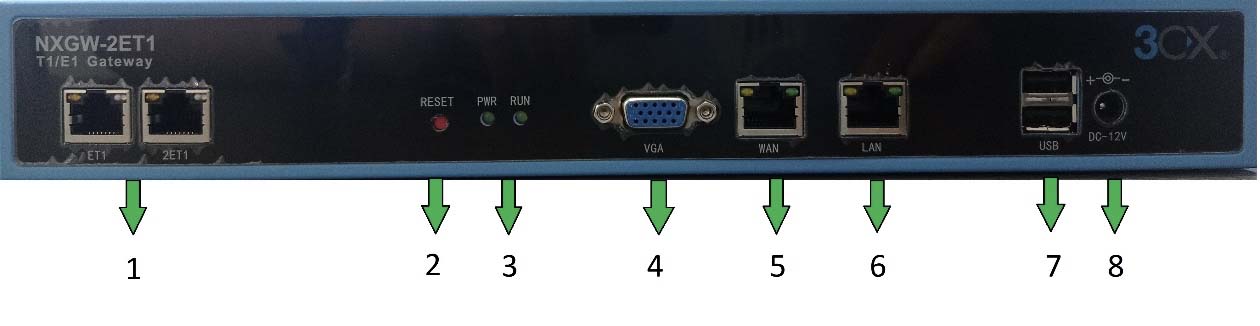
- Port for E1 Line
- Reset Button for Gateway
- Device power indicator
- VGA port
- WAN Port
- LAN Port
- USB
- Power Adapter
Connect WAN Port / LAN Port on E1 Device
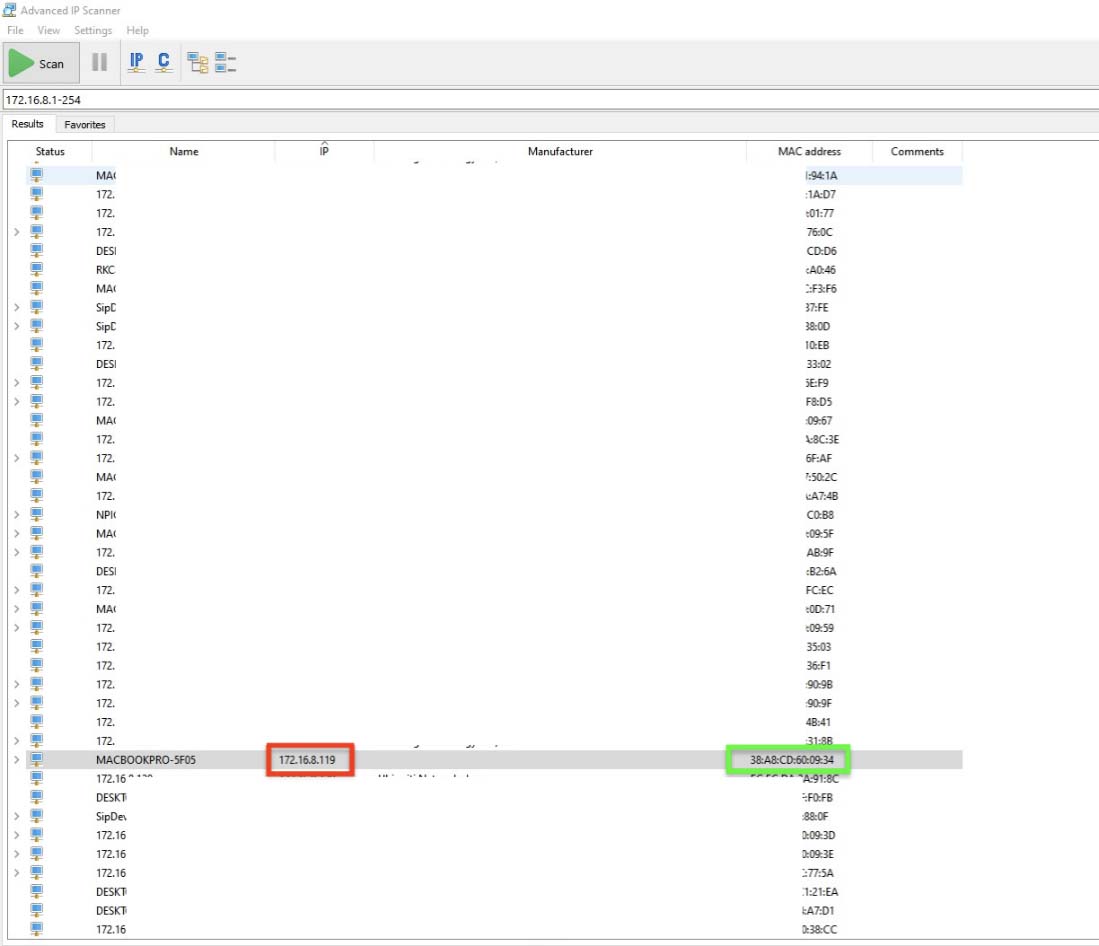
WAN Connection
If there is a DHCP network, you can connect it with the device via the WAN interface and extract the IP address via an IP Scanner (based on WAN MAC found on the device).
LAN Connection
If a DHCP network is not available, you can use LAN1 which is configured using a fixed static IP 192.168.100.99. You can configure the static IP address on your PC and try to access the device via direct connect to LAN1
LAN 1: 192.168.100.99
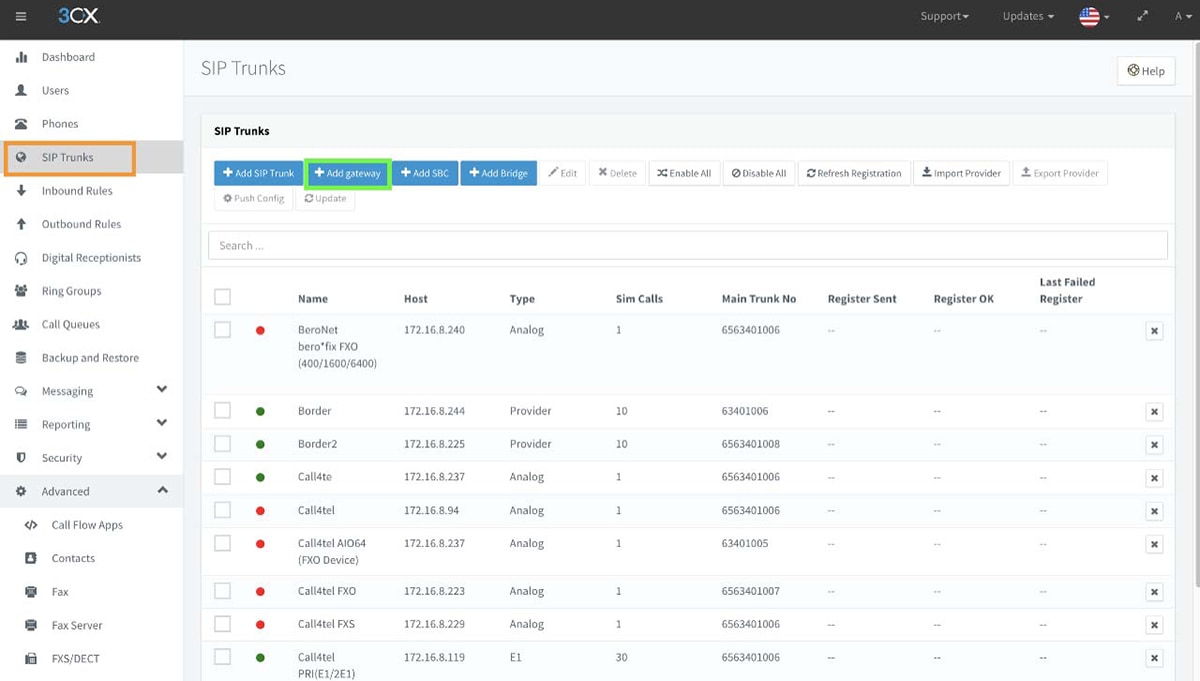
Adding the Gateway to the 3CX Management Console
- Login to your 3CX Management console –> SIP Trunk –> Add Gateway
2. Select the Gateway
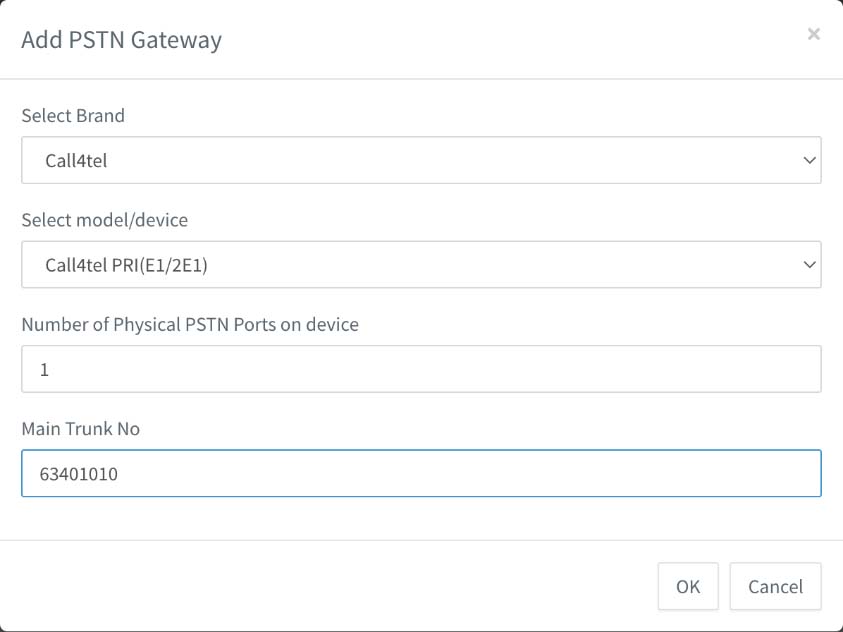
| Brand | Call4Tel |
| Model | Call4Tel PRI (E1/2E1) |
| Main Trunk No | Based on the DID Number |
3. Insert the Gateway Details
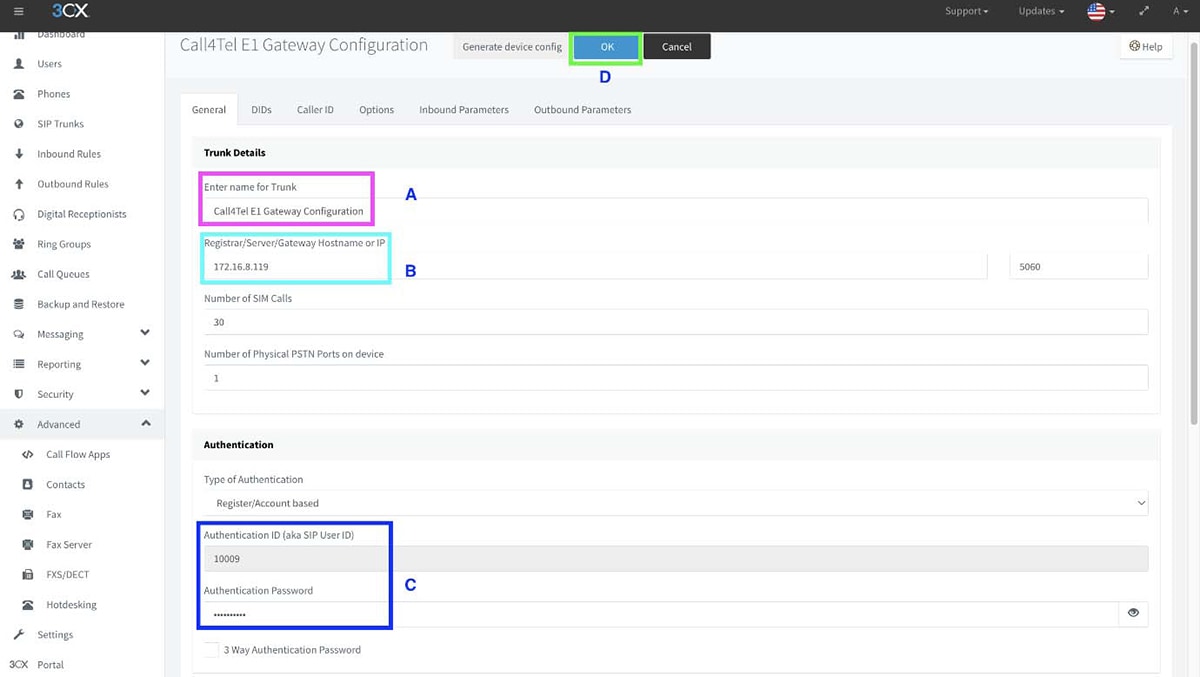
| A. Enter Name for Trunk | Based on preferred Name |
| B. Registrar / Server / Gateway | Gateway IP Address configured |
| C. Authentication ID | Please use these credentials to configure the gateway in next step |
4. Click OK to proceed
5. Check Device Status
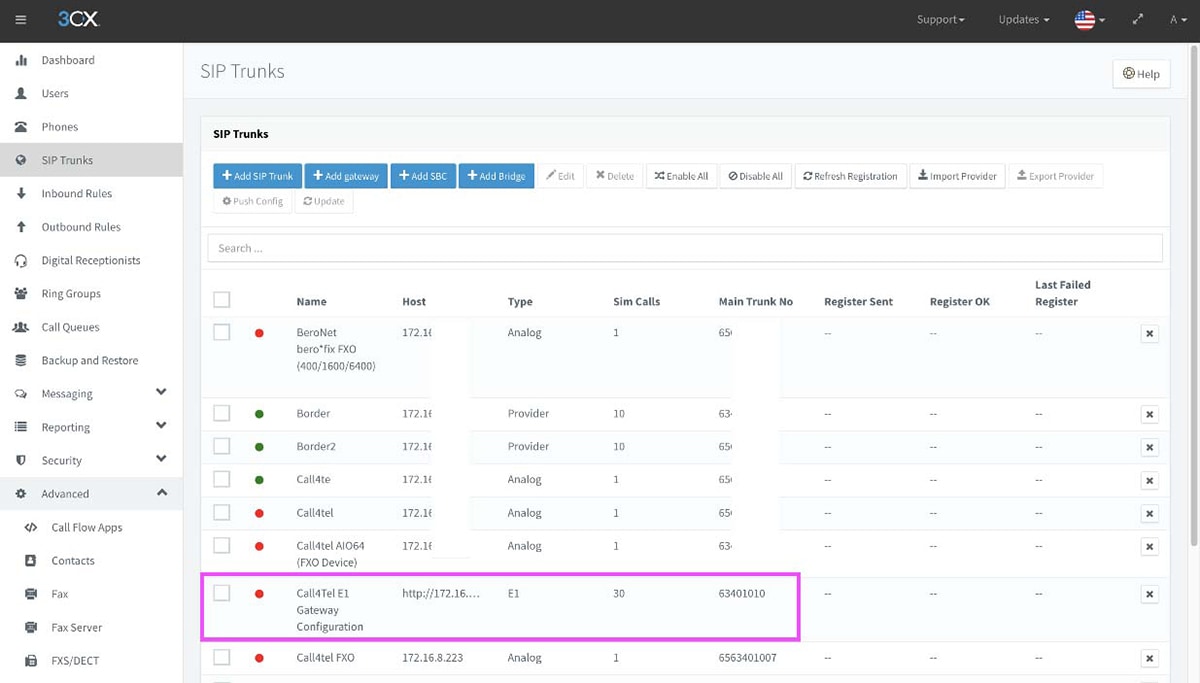
- Device status was added but inactive.
- Click on the device again for further configuration.
6. Generate Device Config
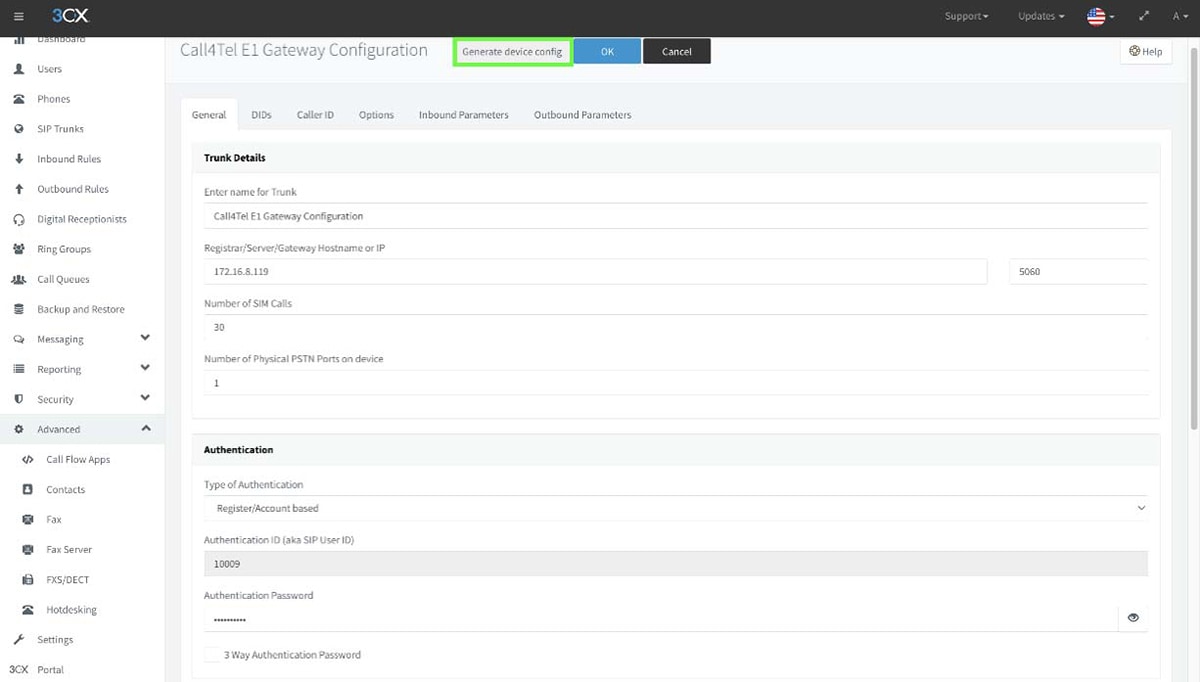
7. Select “Generate Device config”
Call4Tel E1 Gateway Configuration
- You will be directed to the Call4Tel portal upon clicking on “Generate device config”.
- If you are not, the portal can be reached via the following URL http://GatewayIP/cgi-bin/php/system-wizard.php eg: http://172.16.8.119/cgi-bin/php/system-wizard.php
Login Credentials
Username: root
Password: 3cx
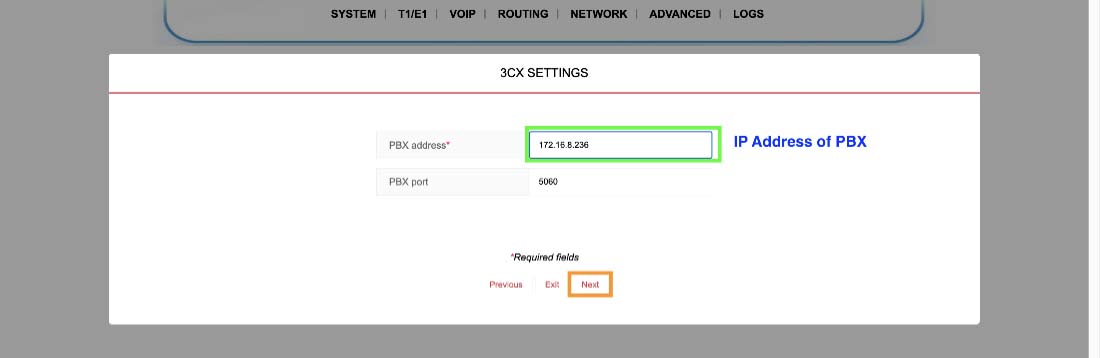
3CX Settings
1. Enter the PBX’s IP address and click on Next
E1/T1 Configuration
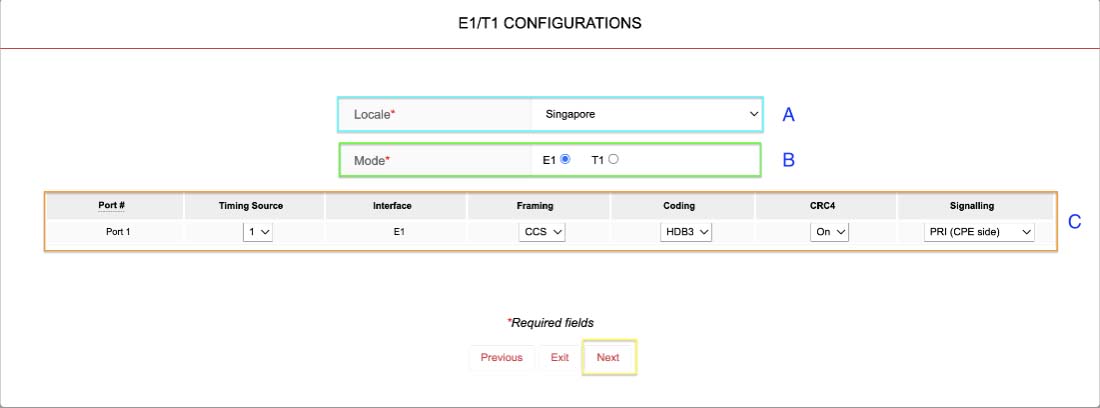
A. Select the Country
B. Choose depending on the current line (E1 or T1)
C. Configuration set up
Click on Next upon completion
Username and Credentials Configuration
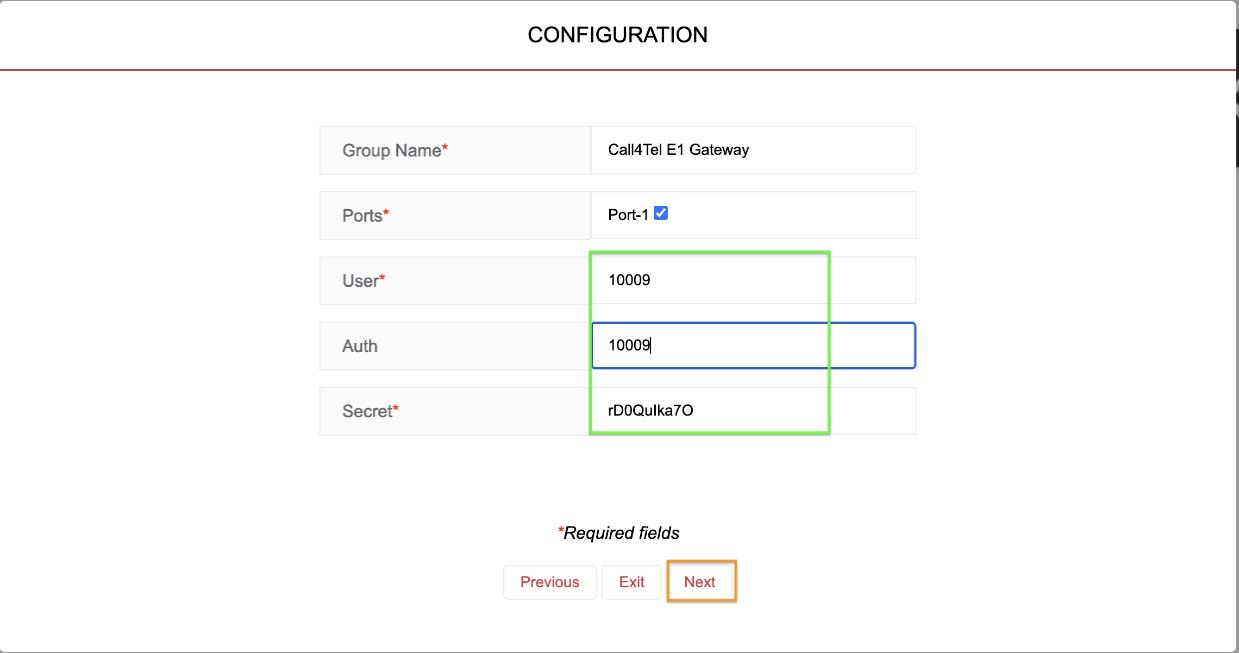
| Group Name | Based on preferred Name |
| Ports | Tick on the Port (There will be 2 ports selection for E2 Device) |
| Users & Auth | Based on the Authentication ID which can be found in the 3CX management console (step 2) |
| Secret Code | Authentication Password in the 3CX management console (step 2) |
Click on Next to continue.
Configuration Summary
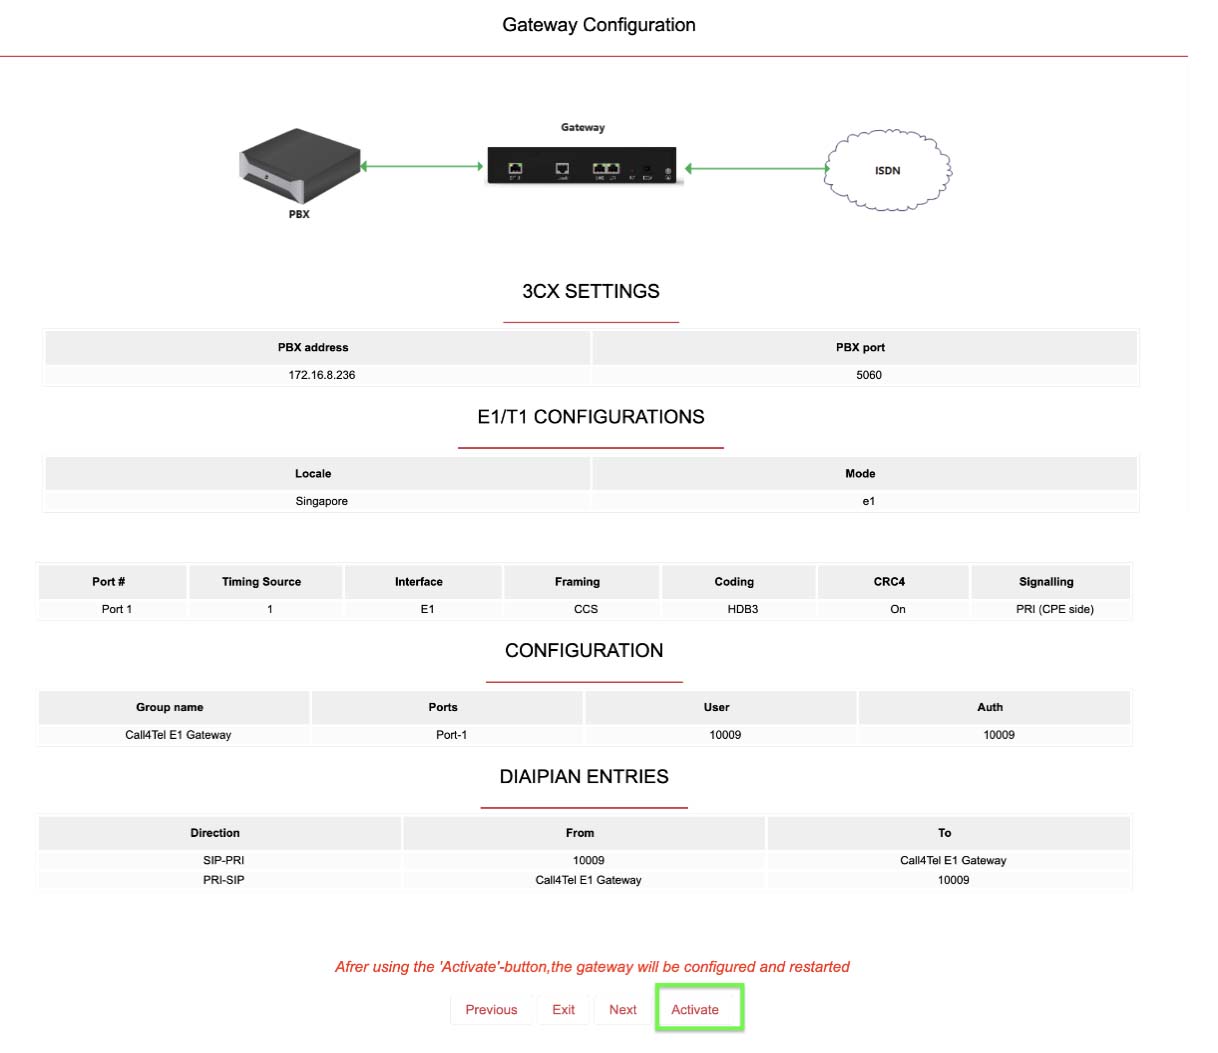
- Configuration summary as per above will appear.
- Please check all the information and click on “Activate” if correct
Activation message prompt
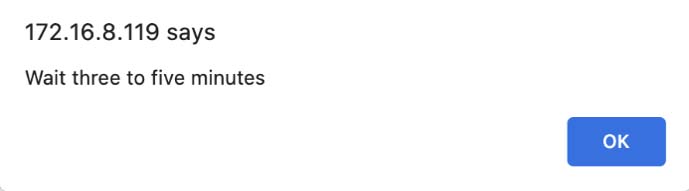
Activation is in progress upon receiving above prompt
Device configured successfully
Gateway System Status

Status “Ok” indicates that the device has been successfully configured
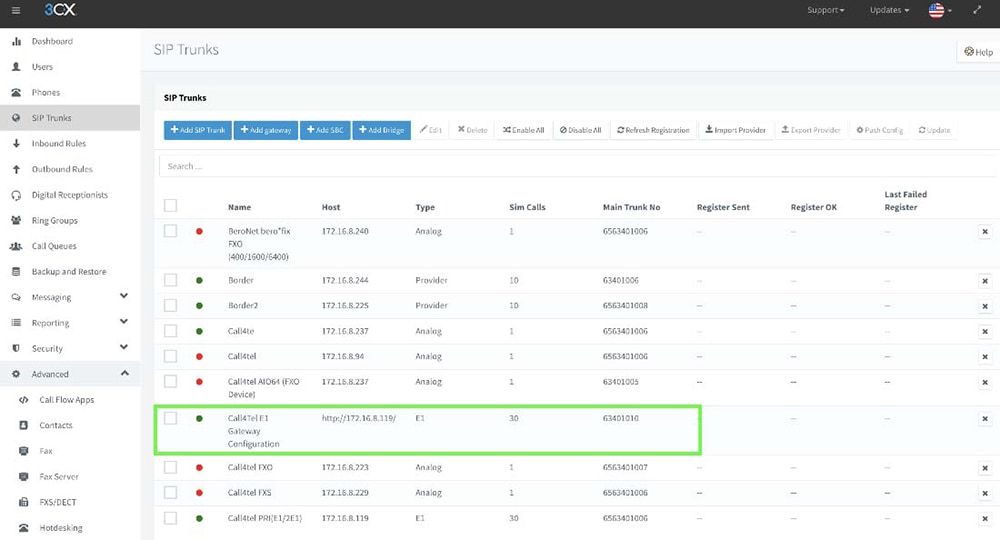
3CX Registration Verification
Login to the 3CX management console –> SIP Trunk
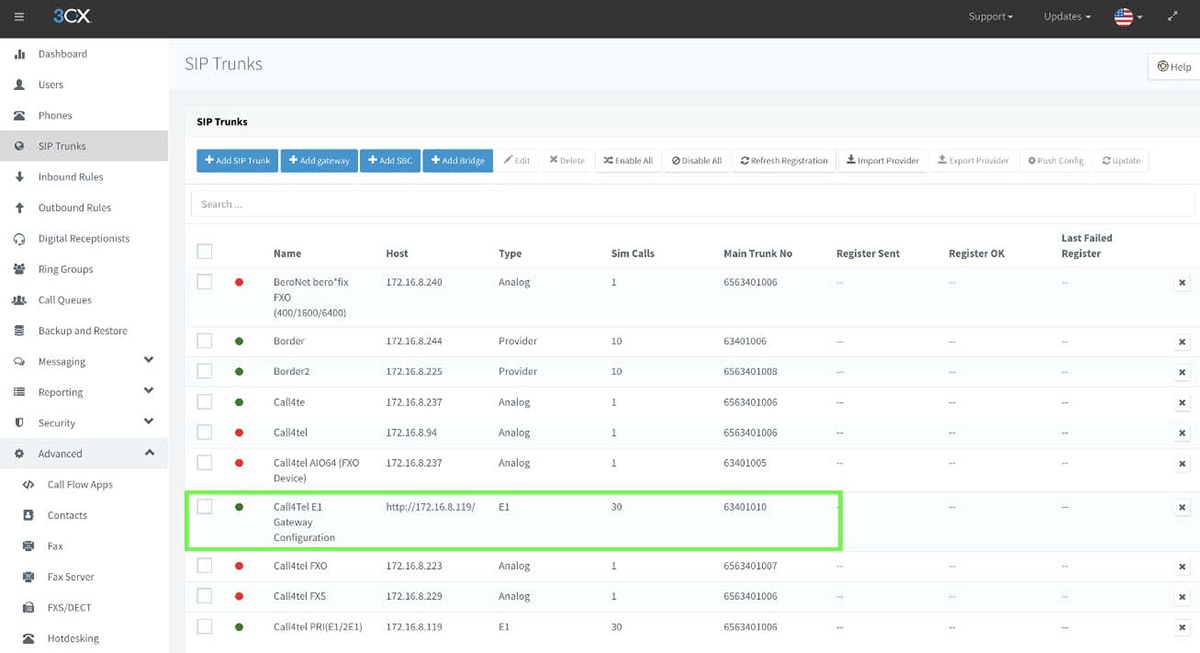
Device status has become Green and Active.