The Call4tel management portal enables distributors and resellers to manage and view their devices from one centralized location. It collects all appliance information and details and links them with end users.
The portal is designed in such a way that it allows distributors to manage their resellers and end-users. From creating an account to resetting passwords and registering products, the portal caters for everything.
Resellers can manage their customers directly from their portal.
Supported Devices
Find the list of 3CX appliances that are supported and managed from within the portal here: shop.call4tel.com
Instructions for Distributors / Resellers:
Distributors and resellers share the same screen and layout; however, resellers have access to fewer features. This manual focuses on showcasing the different features according to whether or not the portal user is a distributor or a reseller.

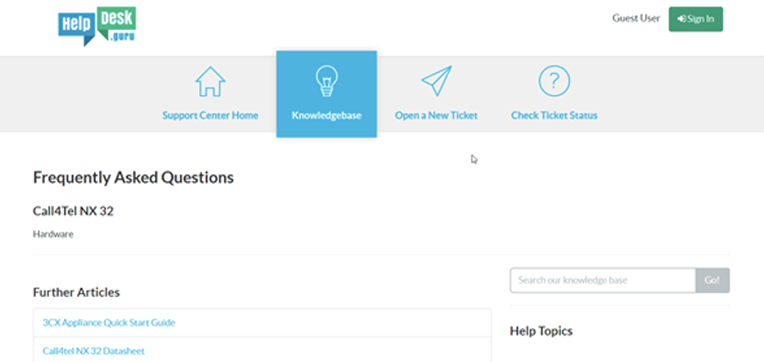
Go here and download the Call4tel NX32 Detector.

Click on the “Scan” button and the application will scan through the LAN to identify the device(s) within the network.
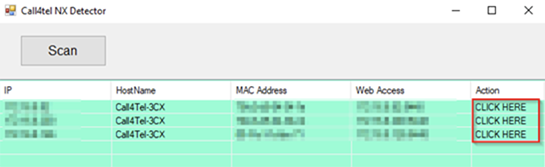
Access the portal by clicking on “CLICK HERE”.
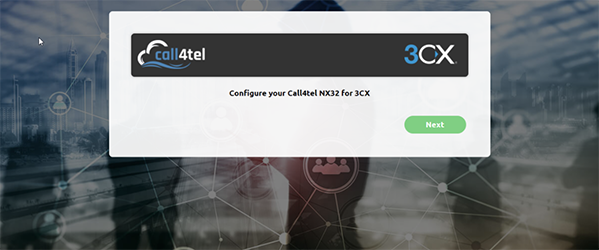
Click Next.
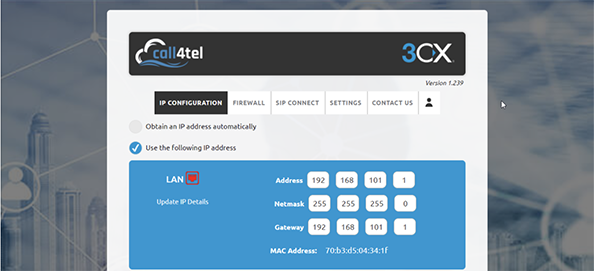
Leave the default LAN IP unless you would like to exclude an IP address from the DHCP.
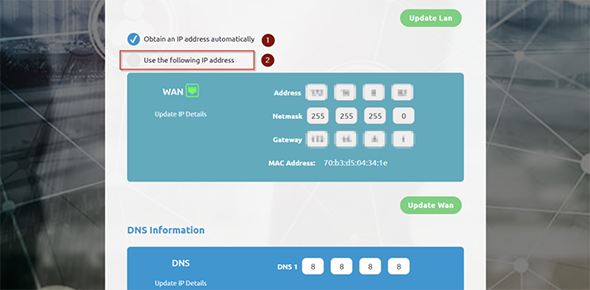
1. “Obtain an IP Address automatically” relies on the DHCP server.
2. “Use the following IP address” refers to static IP configuration, without relying on the DHCP.
Based on the general network/ device policy, it’s preferred to use option 2 for static access.
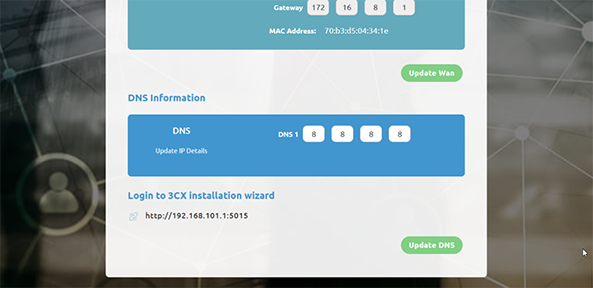
If the network does not have any DNS configured, you can use the default one which points to the Google DNS service.
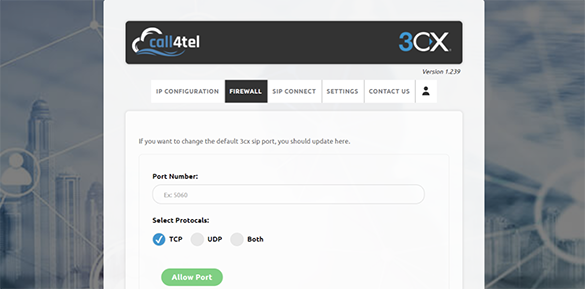
Navigate to the “Firewall” tab to find the service which allows you to change the default port. The default 3CX port should be 5060. Refer to the Device Configuration: Firewall section in this document.
Security advice: Do not allow access to ports that are not relevant.
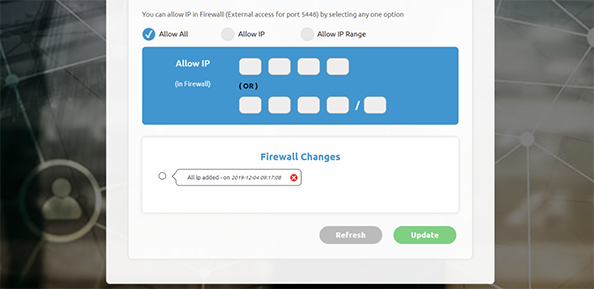
This section allows for further configuration and limits access from specific sources, reducing the chances of the system being compromised.

From within the “SIP Connect” tab you can configure your SIP Trunk. It’s referred to in the Device Configuration: SIP Connect section in this document.

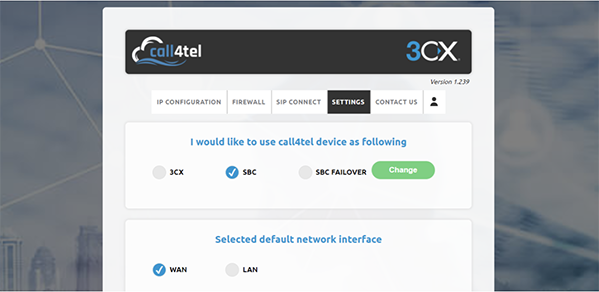
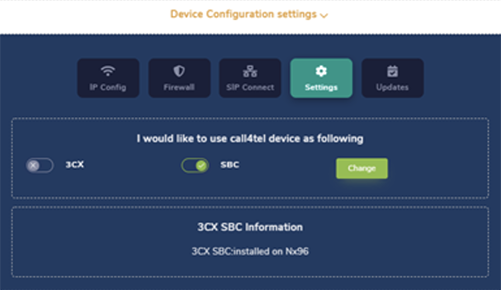
From the “Settings” tab you can select the device’s role: PBX, SBC or SBC Failover.
Important: When changing the role of an already configured device, all previous settings and configurations are deleted.
1 3CX – Configure the device as a 3CX server (console) and to act as a PBX system.
2. SBC – Session Border Controller. Configure the device as an SBC to bridge remote locations and IP Phones.
3. SBC failover – Configure as an SBC failover device (active-active) with high availability.
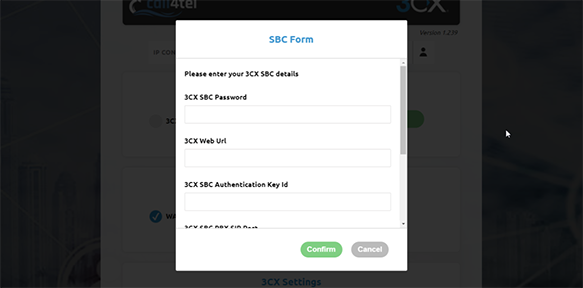
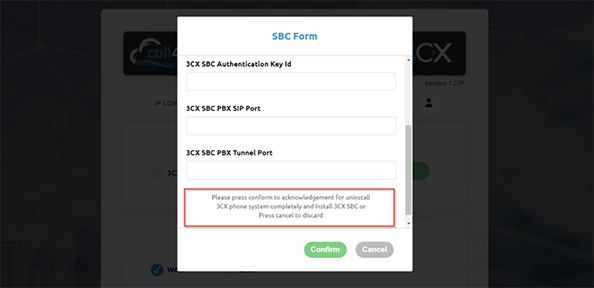
When switching to SBC the above fileds need to be filled in. Input all the information and read the clause stated at the end of the form. Press “Confirm” to proceed with the changes.
Note: Once you click “Confirm” you are no longer able to revert.
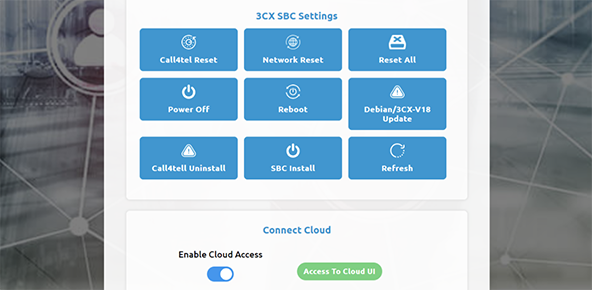
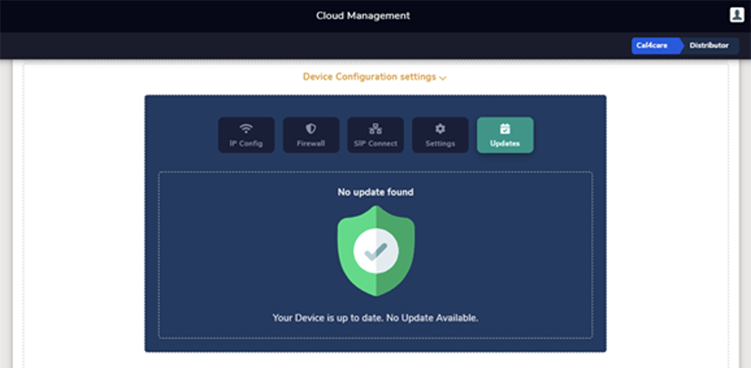
Click on the “SBC Install” option to install the SBC onto the device itself. Do this if the status shown is “Not installed on [device]” as shown below. After install the SBC, it will shown the SBC Config Update in the setting.

Once the installation is complete you will see the” SBC Config Update” option in the settings.
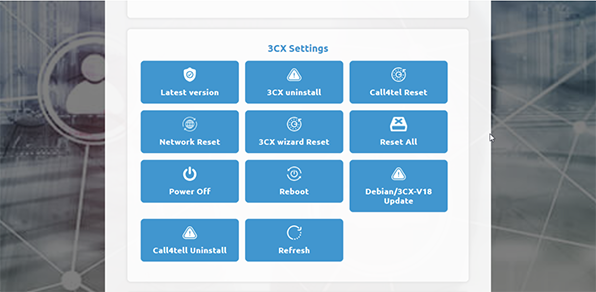
Latest version: Version of 3CX.
3CX uninstall: Remove 3CX from the environment.
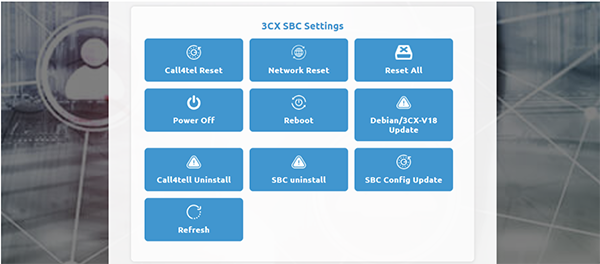
Call4tel Reset: Reset local settings from the Call4tel portal.
Network Reset: Reset all the network IP configuration settings to default.
3CXwizard Reset: Reconfigure the 3CX startup wizard (Portal:5015).
Reset All: Reset all settings & configuration to default (new configuration).
Power Off: Turn off the device
Reboot: Restart the device.
Debian/ 3CX-V18 update: update the OS/ 3CX version from V16 to V18 & Debian 9 to 10.
Call4tel Uninstall: Remove the Call4tel portal from the box.
Refresh: Reload the webpage.
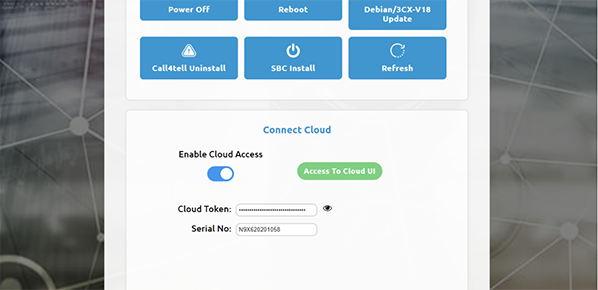
To connect the device to the Cal4tel Cloud portal, switch on the “Enable Cloud Access”. Refer to the device status in Device Management: Device Information section for more details.
An account is required to login to the Cloud UI. If you do not have an account, contact your reseller/
distributor.
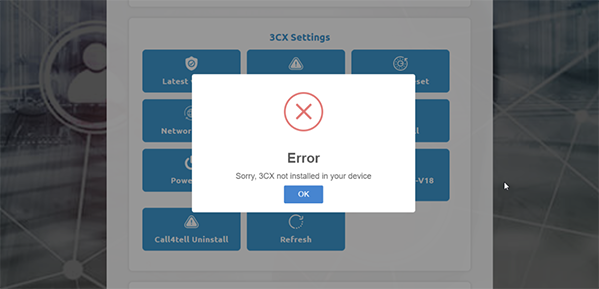
If 3CX is not install on the box, when clicking on the ”3CX uninstall” and ”3CXwizard Reset” you will be prompted with an error. Reinstall 3CX to resolve the issue.
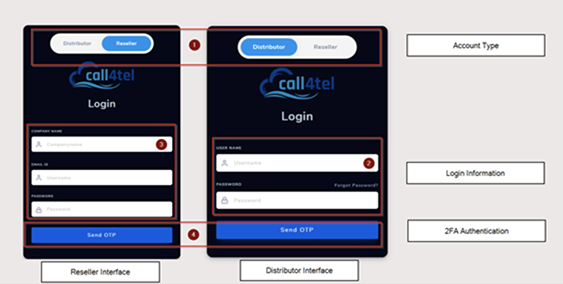
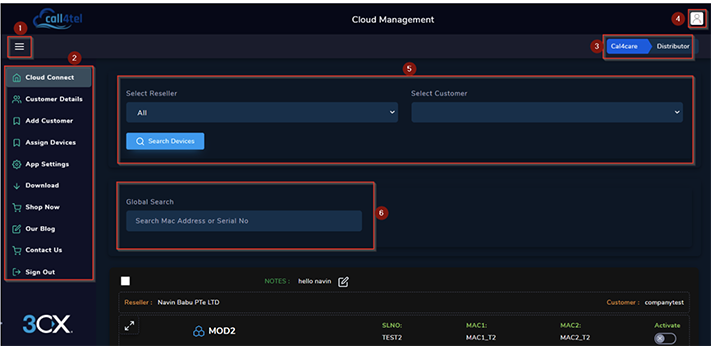
Distributor portal interface (Default: Blue)

Reseller portal interface (Default: Green)
1. Show/ hide navigation panel
2. Navigation panel
3. Account type
4. Account Profile
5. Reseller and customer list
6. Product search (Serial number or MAC address)
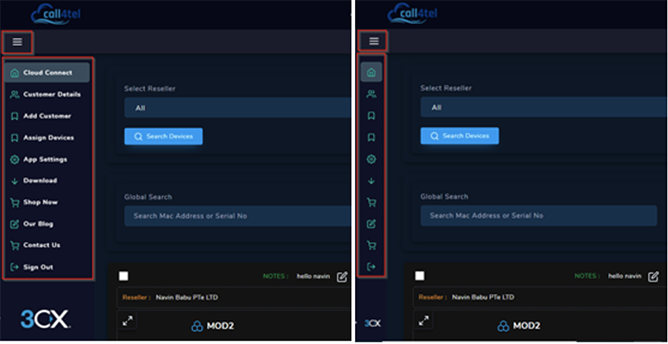
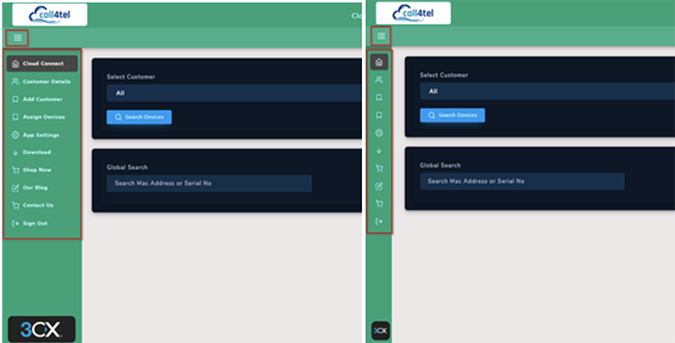
Press ![]() to open or close the navigation panel. The navigator is divided into 2 parts:
to open or close the navigation panel. The navigator is divided into 2 parts:
1. Device and user management (Direct Management)
2. Support and products information (External Link)
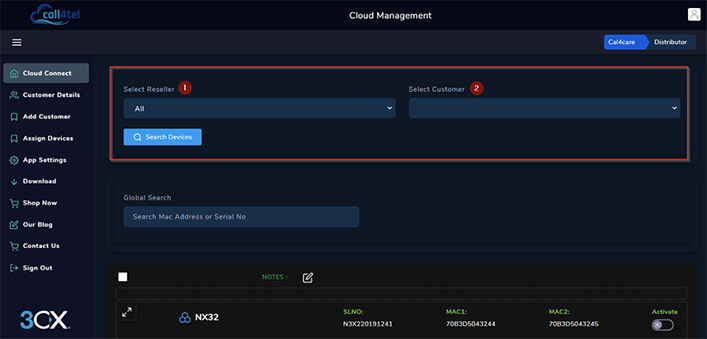
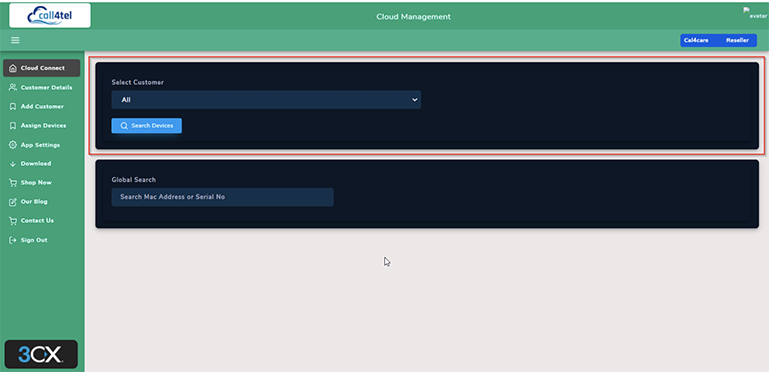
From the search function distributors can search for their resellers and customers and resellers alike can search for their customers. To perform the search:
1. Select the reseller (Option for distributor only)
2. Select the customer
3. Press ![]()
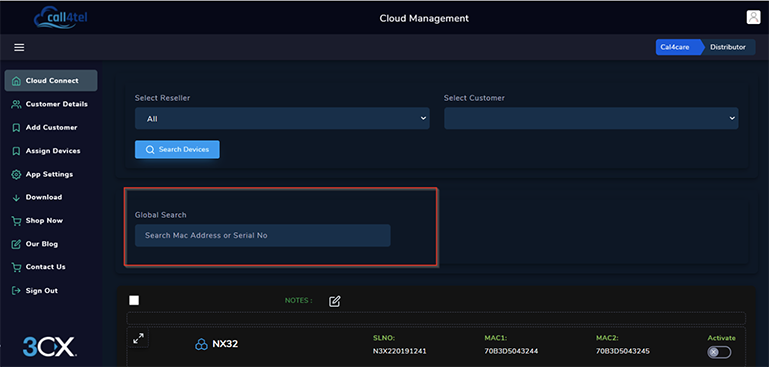
You can search for devices from the global search function. Simply enter the Mac Address or Serial Number of the devices to perform the search. Refresh your browser (F5) before performing a search.
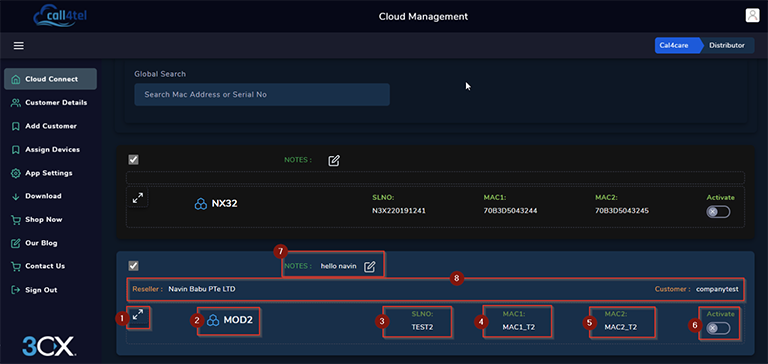
1. Expand the view of selected device
2. Device Name
3. Device Serial Number
4. MAC Address (WAN Port)
5. MAC Address (LAN Port)
6. Device Status (Online/ Offline) – F5 to refresh status
7. Notes for the device
8. Device Owner and Reseller
Distributor View:
Reseller View:
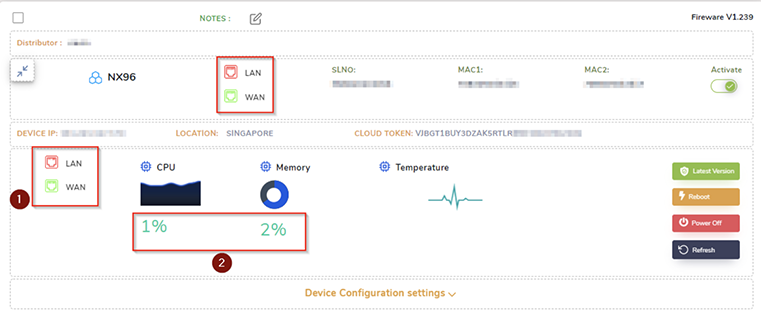
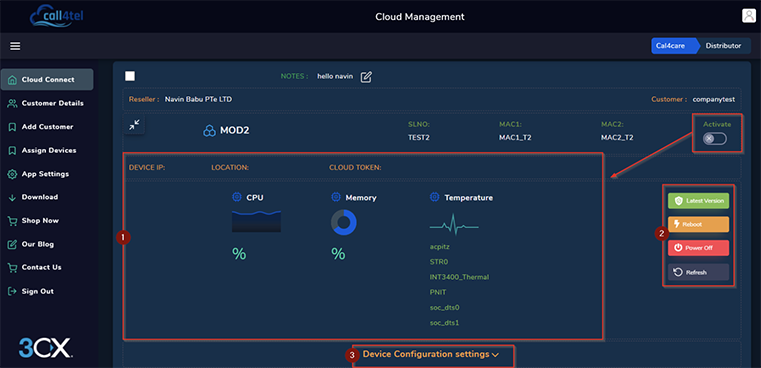
1. The display panel shows the device’s status. CPU & Memory, temperature, IP Address, location of the device, and cloud token if applicable. Values are only shown if the device is online (Active).
2. Use this panel to update, reboot, shutdown or refresh the device.
3. Remote configuration settings (IP, firewall, SIP, etc).

If the device is active (Online), it will display the CPU and memory status, as well as the LAN and WAN connection. (Press F5 to refresh the status)
It will also display the IP address and role for which the device has been configured. Detail configuration is referred to in the next chapter of this manual.
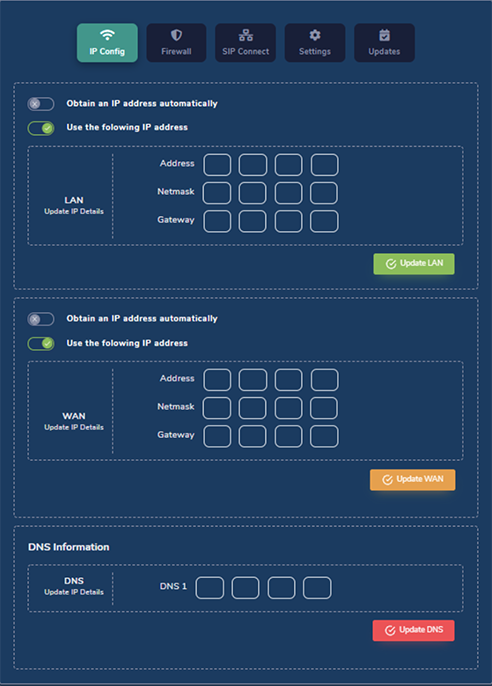
Both the LAN and WAN can be configured remotely via the management portal. It’s recommended to have a static IP address (both for LAN and WAN) to the device(s) for management purposes. DNS should be configured to allow for address translation onto the Internet.
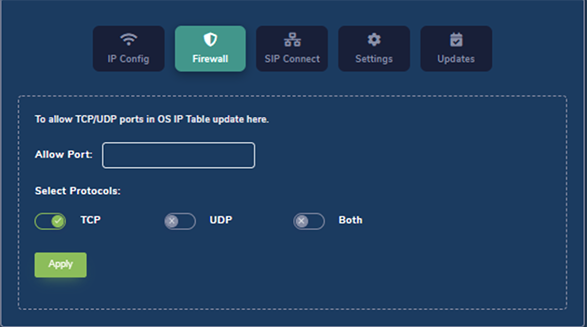
By default, all traffic is allowed through the firewall. Further configure your device in order to block certain traffic and increase device security.

SIP (Session Initiation Protocol) configuration enable SIP trunk MPLS Line configuration to communicate with the SIP provider (SIP Server) through MPLS Line. Once you connect to the interface, route the traffic to your SIP trunk provider. Select the interface you connected the MPLS line and enter the destination’s IP address

You can only assign one role per device.
3CX: If the environment does not have a 3CX server, this will be the mandatory configuration.
SBC: For branch offices with more than 5 users, it is advised to have an SBC configured to simplify and streamline the communication between remote locations as well as enhance security and QoS.
Select the correct role and press change (all previous settings will be removed). Reconfigure the device to the desired role.
Alternatively, you may change the configuration of the device via Direct Web Access. The default port is 5448 (ensure the port is mapped in the firewall for external access).
If there is a new Call4tel portal release, it will be indicated here.
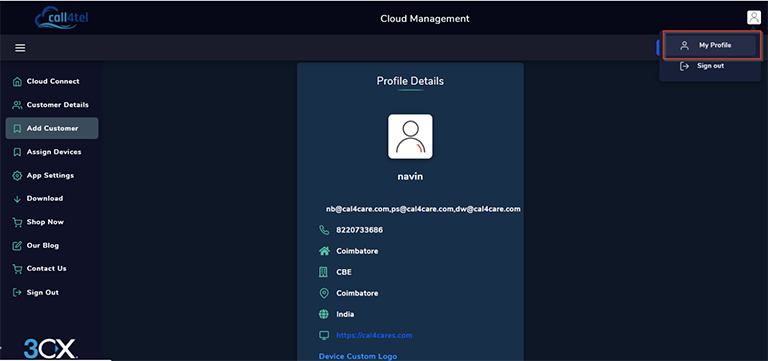
The “My Profile” option shows the user information. Profile information can only be edited by super admins. Contact Cal4Care for support.
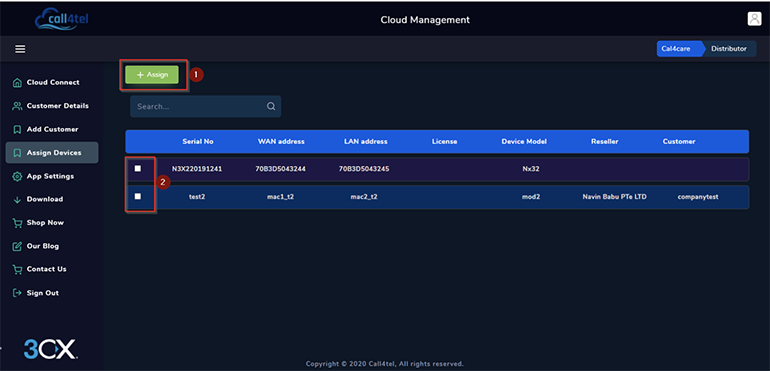
1. Select the device you want to assign and click on the ![]() button.
button.
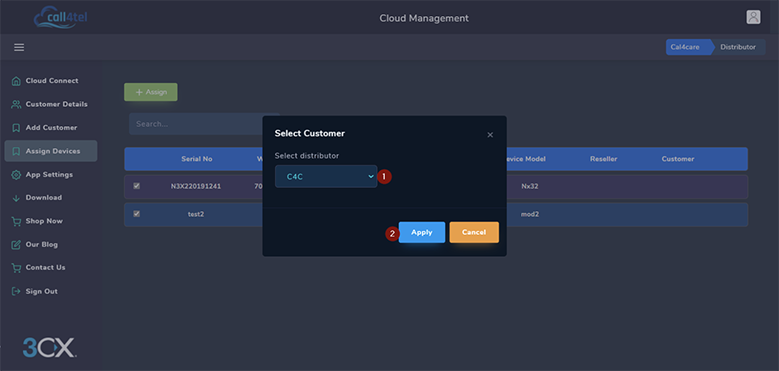
2. A drop down with the company list (resellers or end-users) will appear, select the company and click “Apply”.

From here you can personalize the interface and change the theme.
The “Download” option will redirect you to the Knowledgebase. Alternatively, you can access the site from this address: https://helpdesk.guru/kb/faq.php?cid=21