1.1 URL
| WAN | :5448 |
| LAN | 192.168.101.1:5448 |
1.2 To Access device
| WAN | 1) Connect WAN to DHCP Network 2) WAN gets the IP from the DHCP Network to find the IP. Download Call4tel NX Detector tool from the link below. Download Link: https://update.call4tel.com/detector/NX_DETECTOR.zip Once the IP address is found proceed with URL: http://< your ip >:5448 Mandatory: Set the WAN IP (the one connected to the internet and the phone network) to be static. |
| LAN | 192.168.101.1:5448 |
1.3 Connect the WAN port to your Switch or Router, using the network cable (included).
1.4 URL: http://< your ip >:5448
1.5 Enter username & password 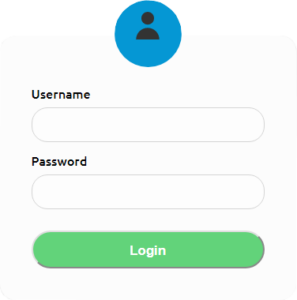
Username: root | Password: 3cx
LAN
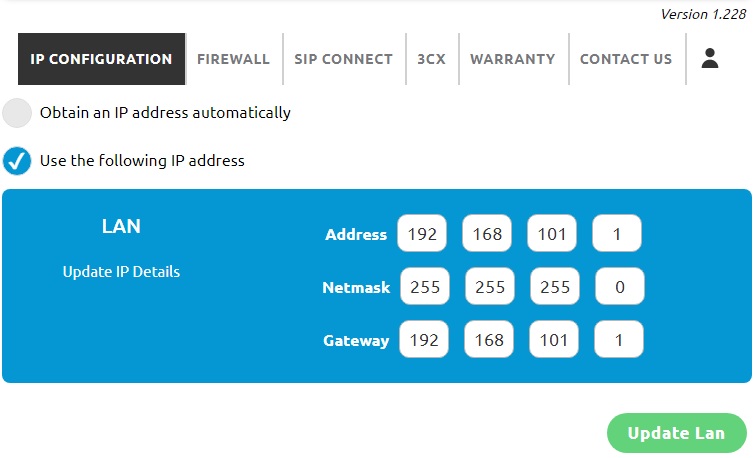
2.1 The option “Obtain an IP address automatically” is enabled by default.
2.2 By selecting “Use the following IP address”, the system will update to a custom LAN IP Address.
WAN

2.3 The option “Use the following IP address”, is enabled by default.
2.4 Select “Obtain IP address automatically”.
DNS Information
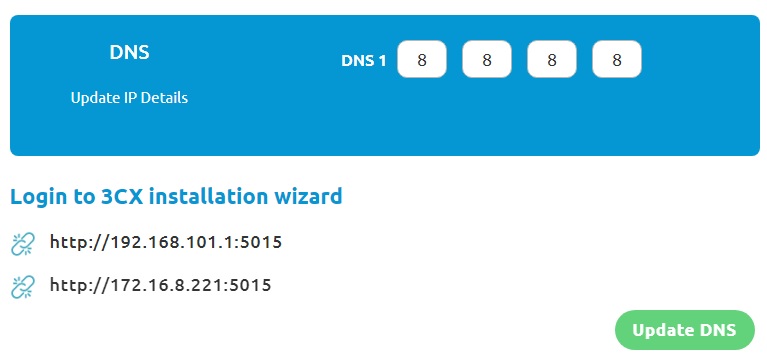
2.5 The “DNS” is obtained automatically by default.
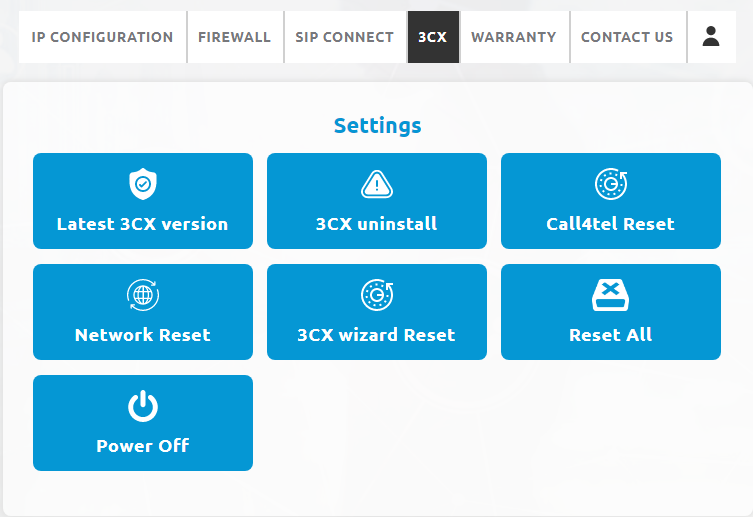
From here you can check your 3CX version, reset the NX Series device, uninstall 3CX and so on.
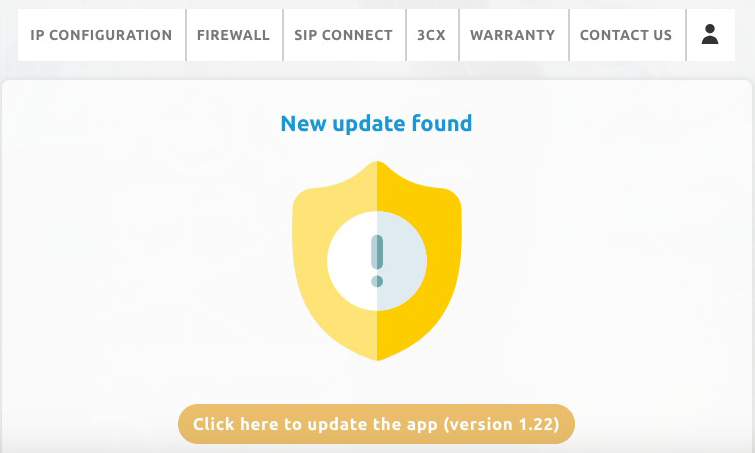
You will be notified once a new version is available. To update simply click “Click here to update” button.
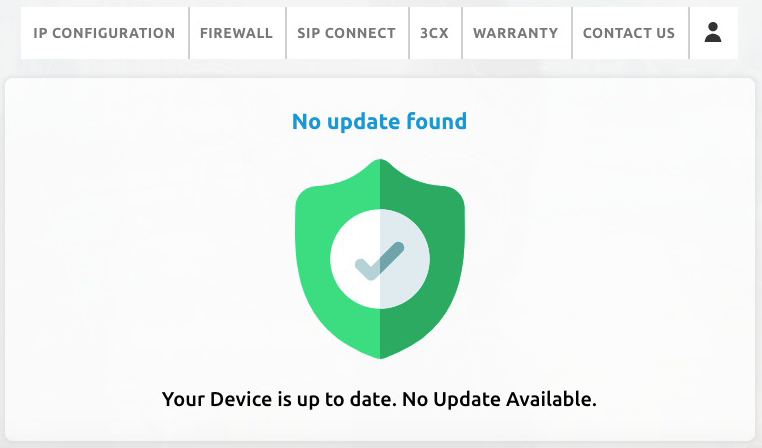
Once the update is complete, you will be notified that “Your device is up to date”.
- When the power source is connected, you will hear a short beep which means, the system is powered up.
- When the system is booted and ready, you will hear a long beep.
- A long press on the RST button for 2-3 seconds and release, will power off the system. You will hear four beeps as confirmation. The system is now successfully powered off.
- For reset – a long press on the RST for a maximum of 8 seconds until you hear ten rapid beeps, resets 3CX, the network settings and auto reboots to a fresh installation. Proceed to use the default IP address to access the setup interface.
- If the 12V power is disconnected or there is a sudden outage, the UPS battery residing inside is automatically triggered & executes the “Power-off” command to shut down the system safely, avoiding any data loss or system damage.
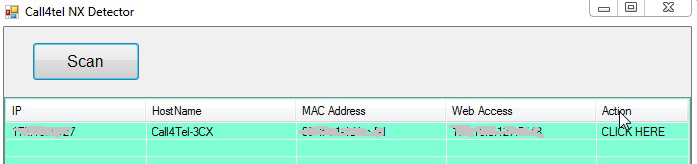
The NX Series detector tool detects the NX Series device within your network. Click here to download.
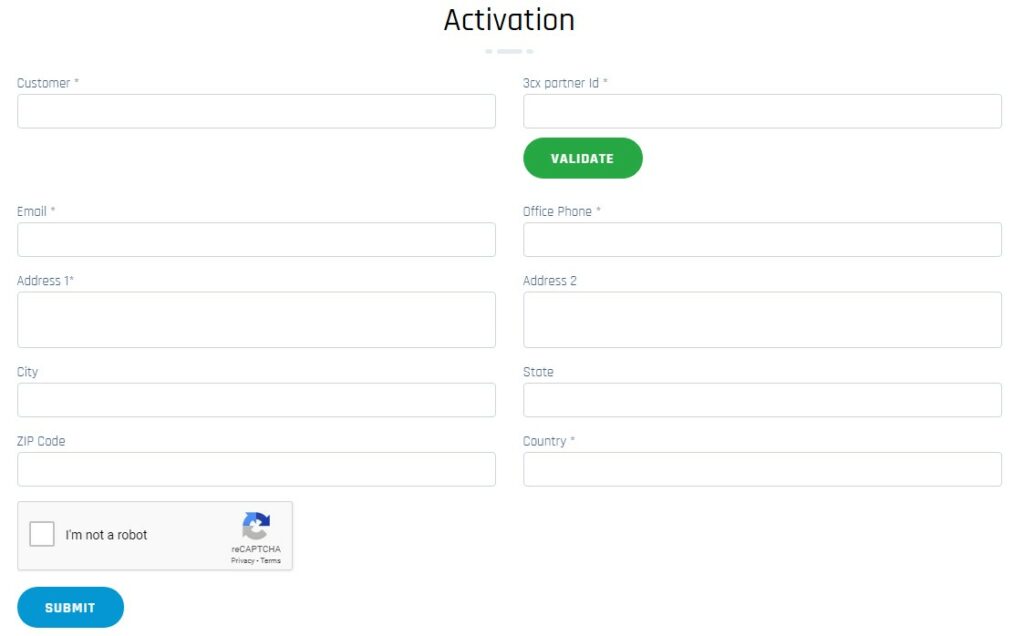
- Go here and simply fill in the form to register your account. You will then receive an email to confirm your email address.
- Go to the Call4tel portal login area and enter your Username and Password and then click Login.
- From the License Details page you will see the list of Licenses. Click “Add new” to register a new license.
- Enter your device serial number and mac address and click the “Get new license key” button.
- You will receive an email with your 3CX License details.