The Call4Tel AiO64 device comprises of a 3CX Server and FXO / FXS Gateway into one single appliance. There are two configuration methods required for this device, Gateway and 3CX Server.

- Reset Button for Gateway
- Analogue Line Status
- FXS Port & FXO Port
- LAN
- WAN
- USB
- HDMI
- Power Adapter
- Reset Button for 3CX Server
Step 1: Connect WAN Port / LAN Port
WAN Connection
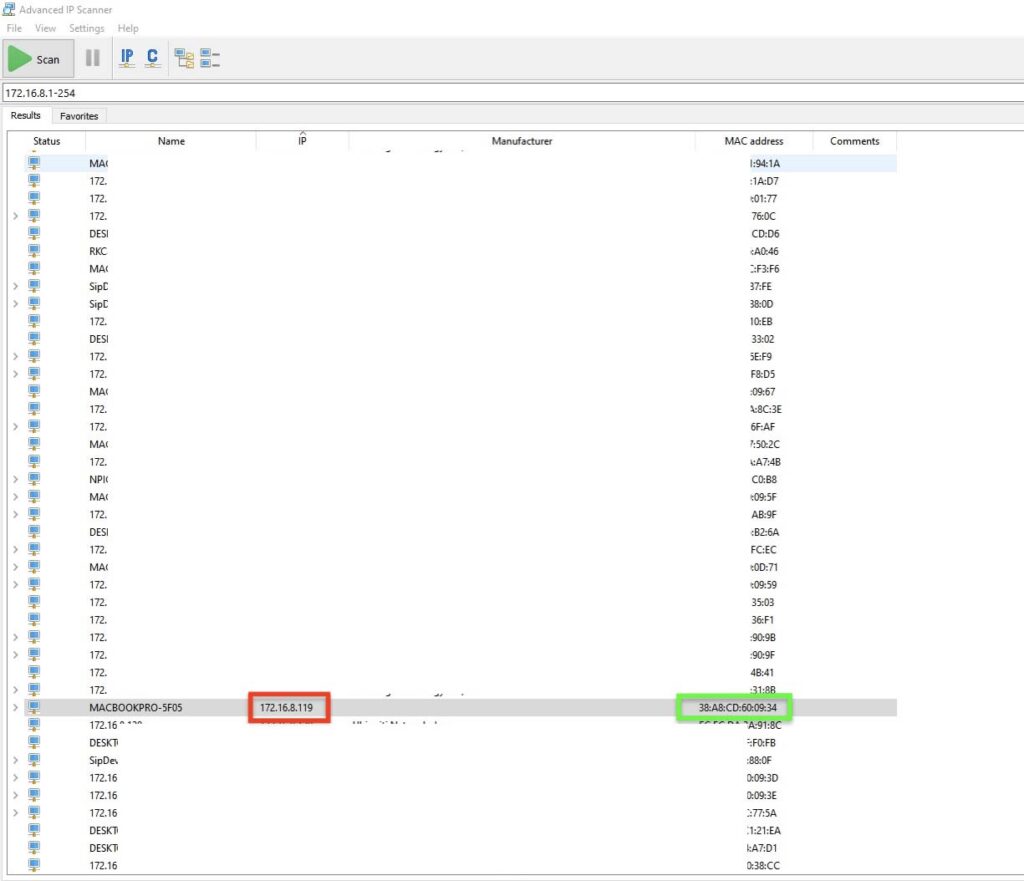
If there is DHCP, extract the IP address automatically via IP Scanner (based on WAN MAC found on the device).
LAN Connection
If DHCP is not available, IP address (can be found on the device) and you will need to enter this manually.
LAN 1: 192.168.101.1
LAN 2: 192.168.101.99 (For Gateway)
Step 2: Configuring the Gateway
Open your browser and enter the IP address of the device based on WAN / LAN configured in Step 1, you will be directed to the Call4tel portal.
*Add (:5448) in the IP address eg:192.168.101.1:5448
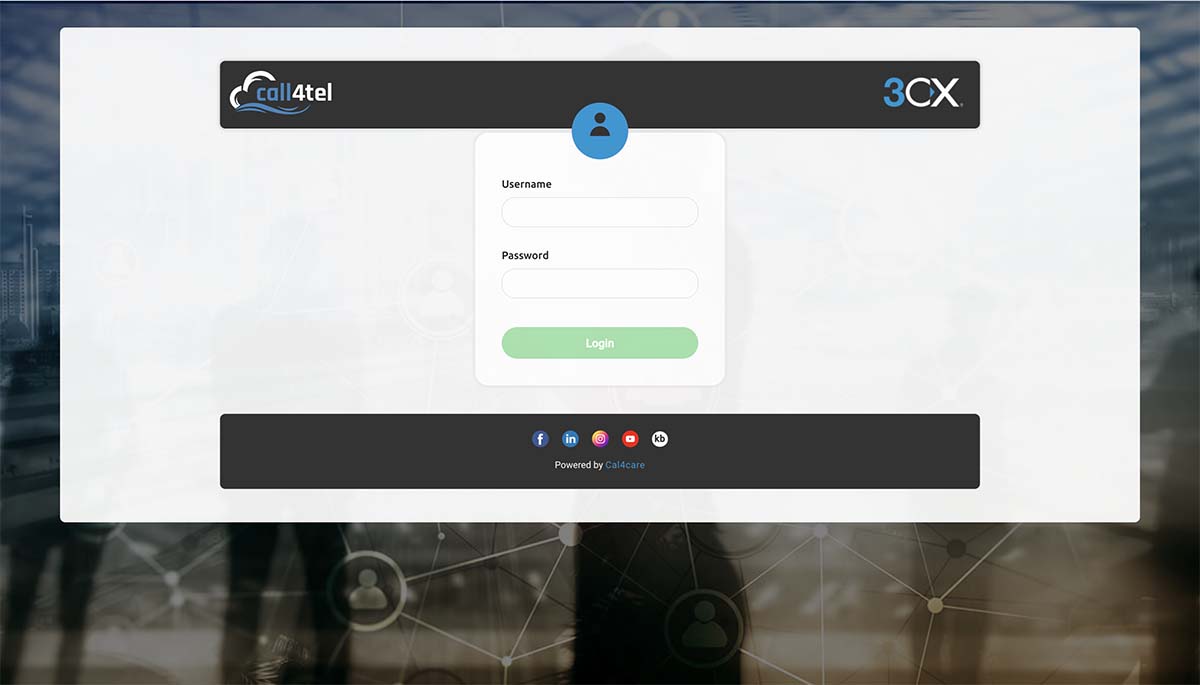
Login Credentials
Username: root
Password: 3cx
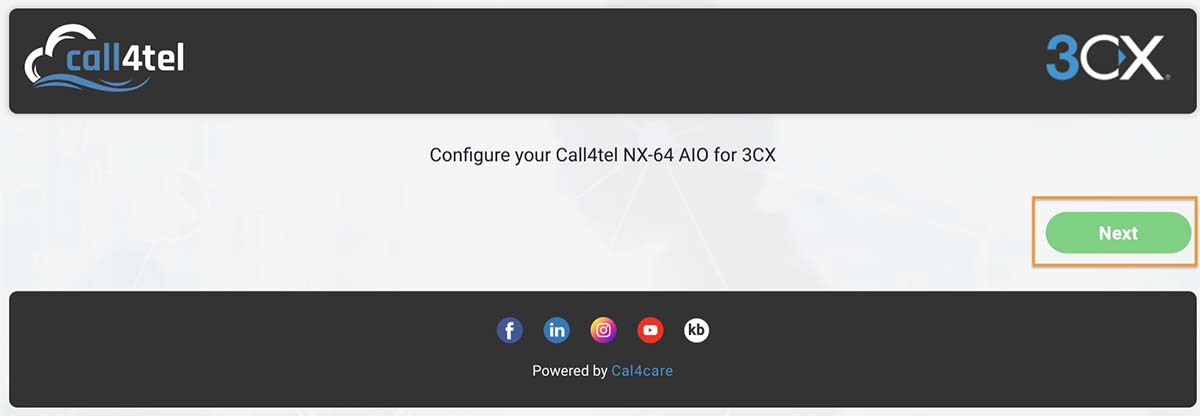
Upon successful login, click on Next
Step 3: Gateway IP address Configuration
Select the Gateway (AiO) tab and click on Network.
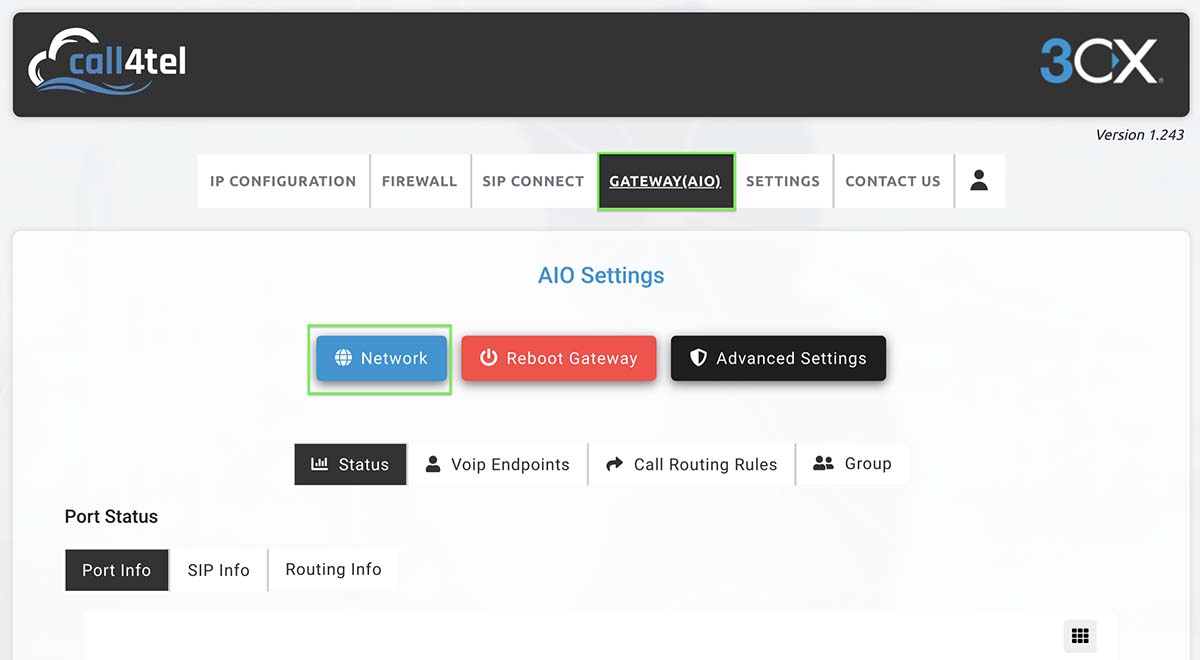
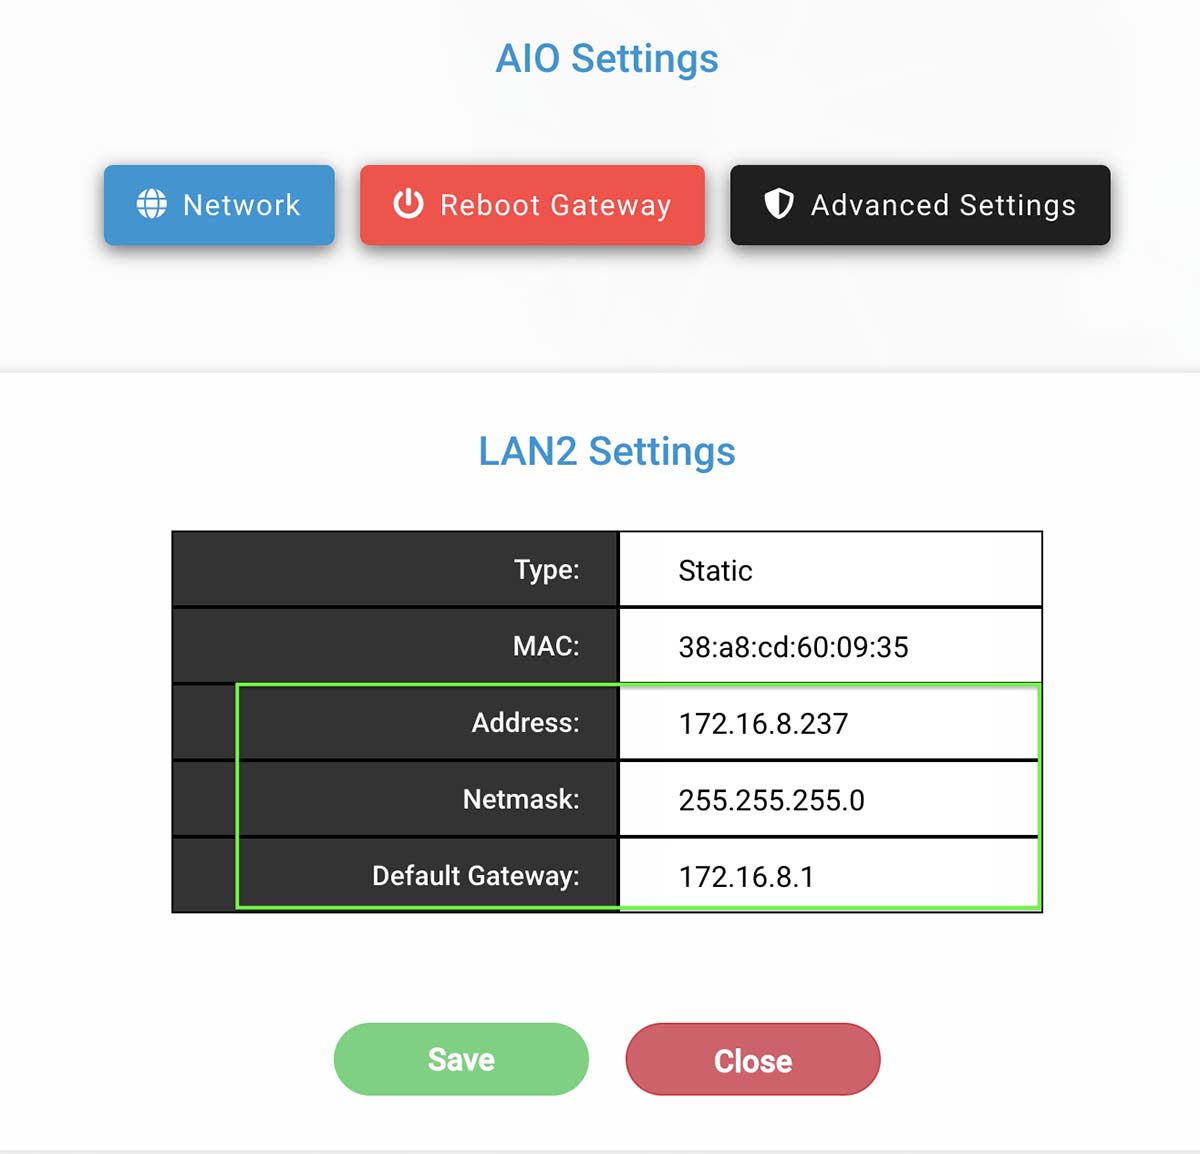
Enter the following details:
Address
Netmask
Default Gateway
Click on “Save”.
Step 4: 3CX Server IP address Configuration
To configure the 3CX server, you must use LAN Port.
*If you have configured the gateway via WAN Port earlier, please switch to LAN Port.
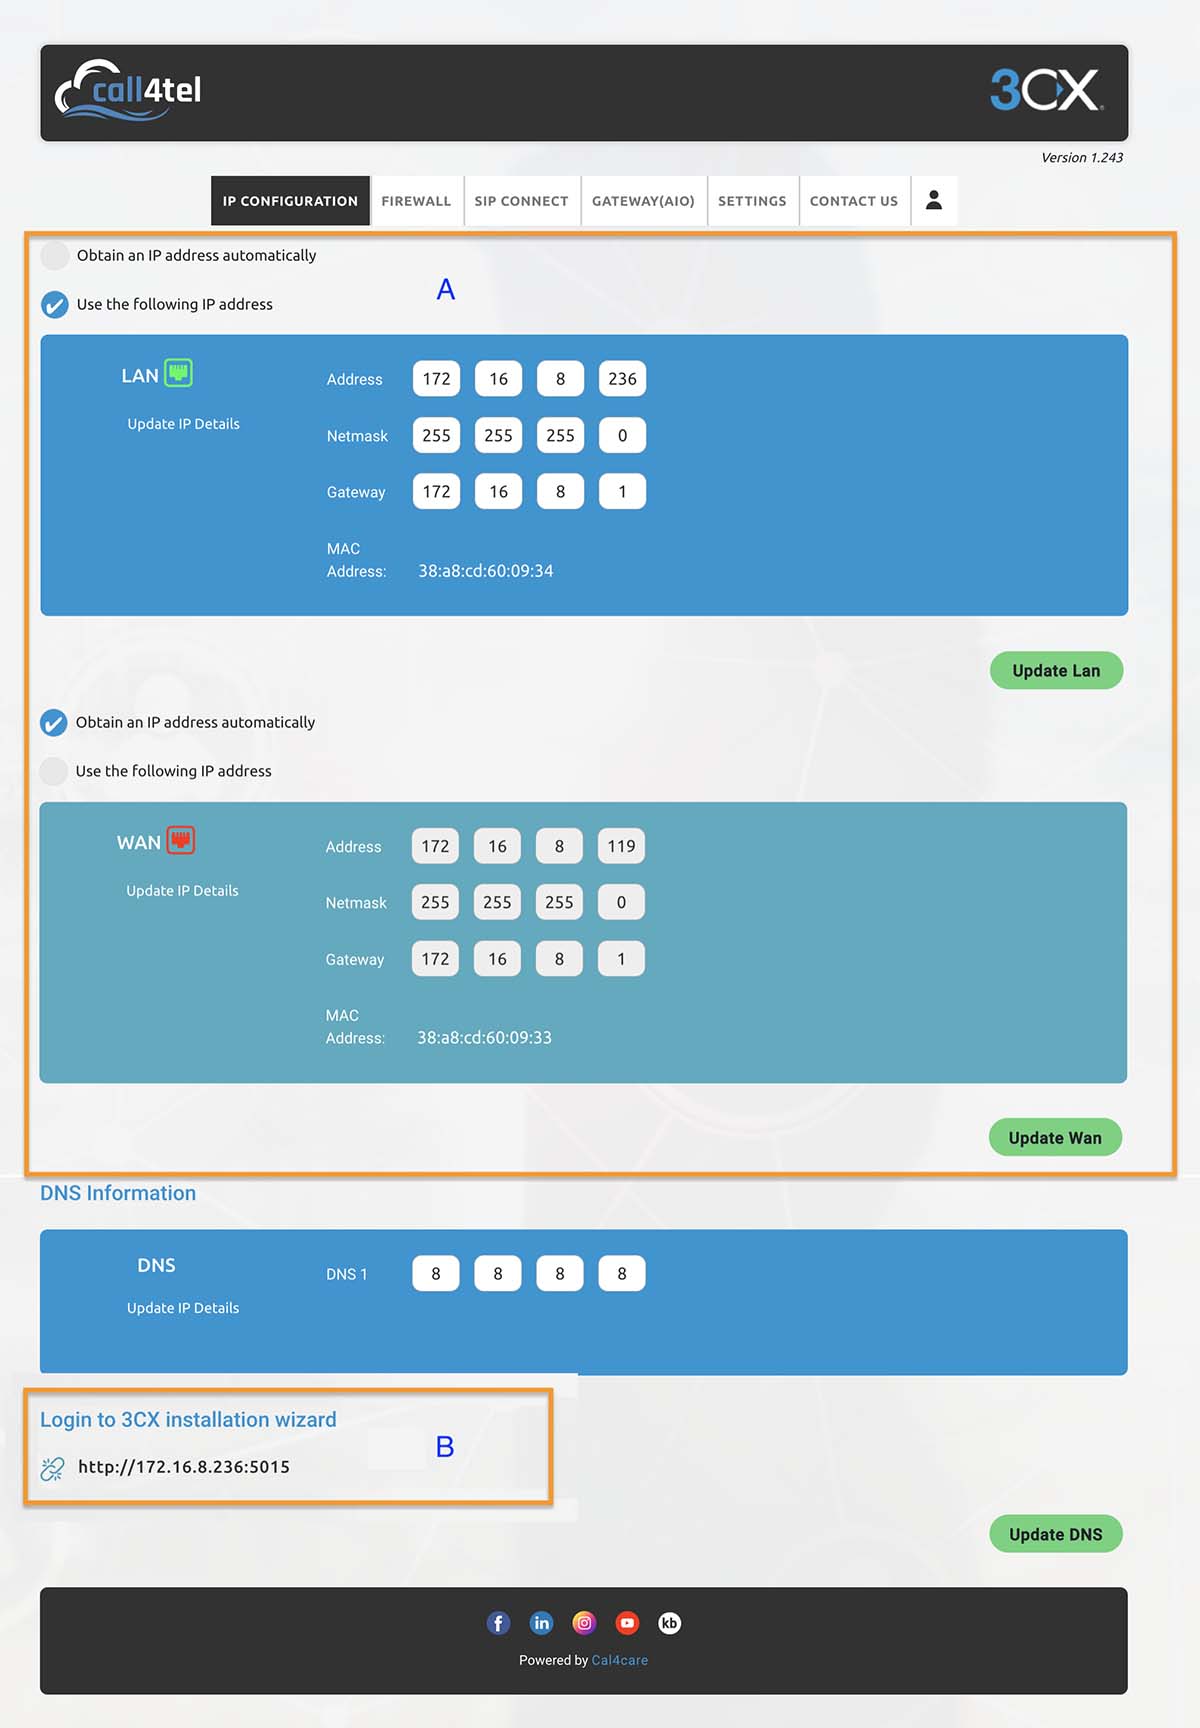
Enter the IP Address, Netmask and Gateway based on LAN. There will be icon to showcase active connection.
Login to the 3CX installation wizard to continue on the 3CX instance set up
Step 5: Adding the AiO in the 3CX Management Console
Login to the 3CX Management Console and go to SIP Trunks –> Add Gateway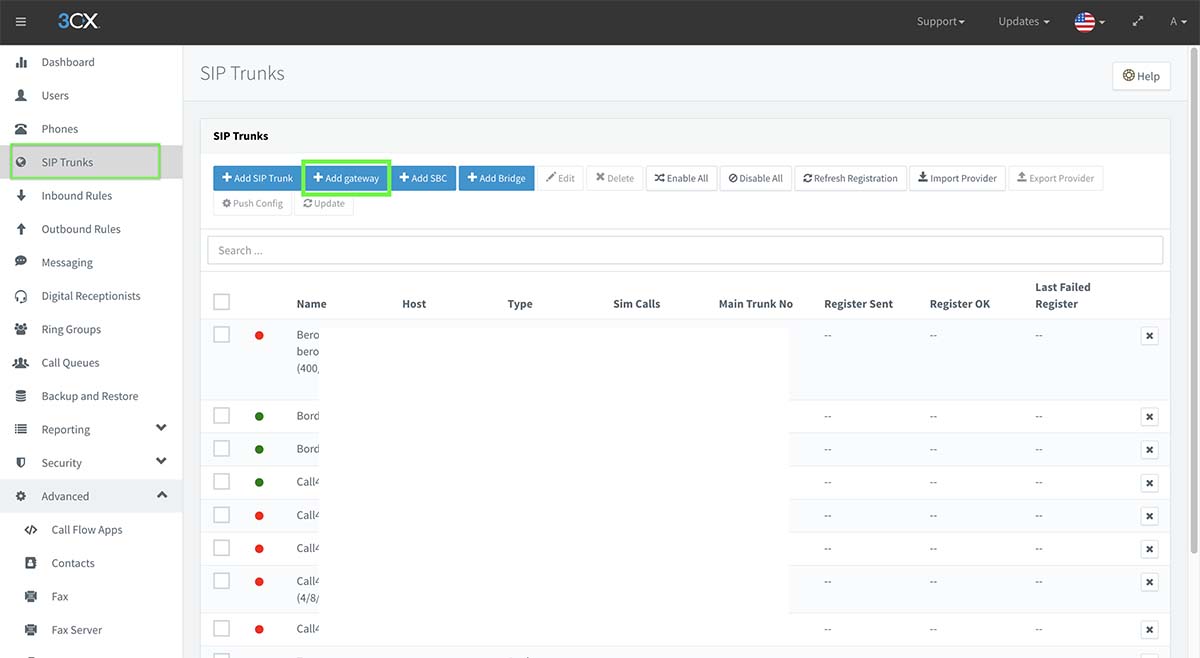
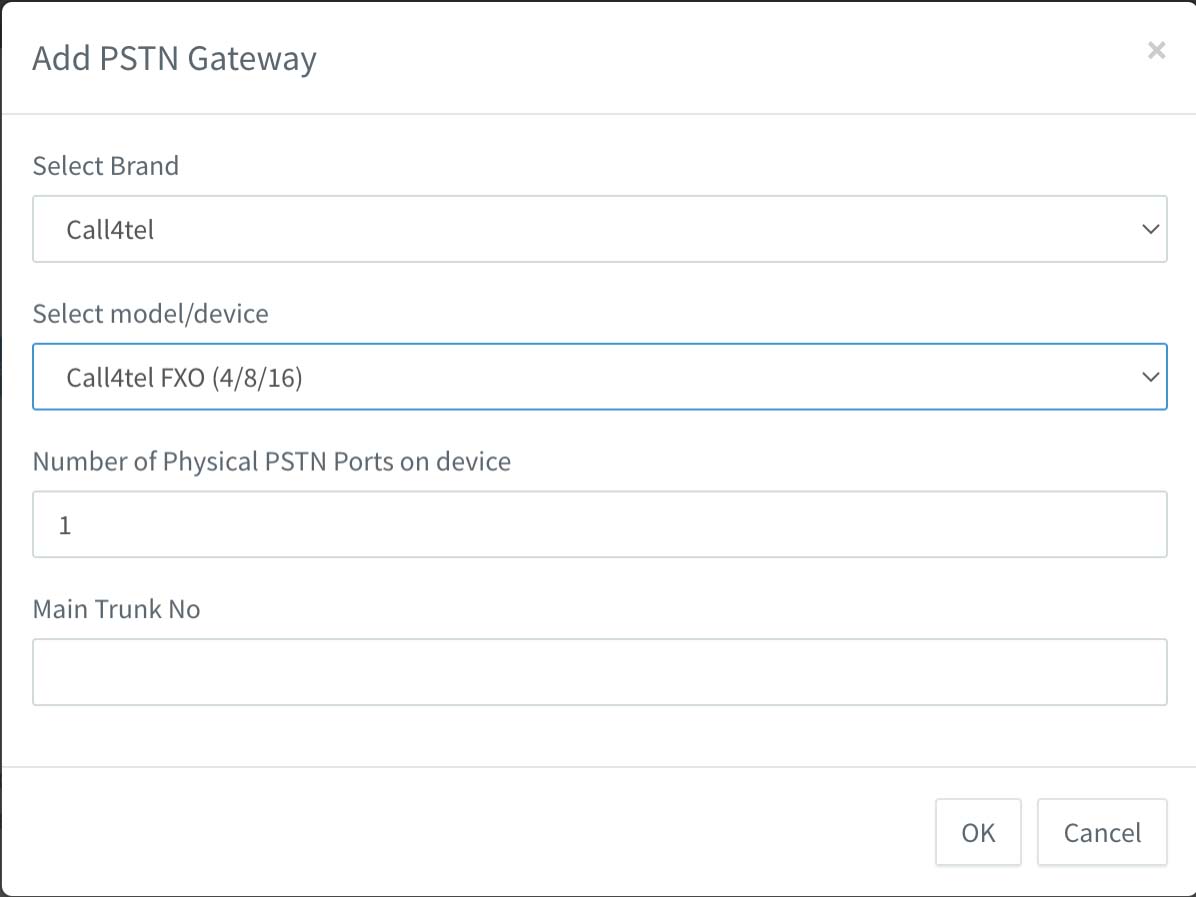
| Select Brand | Call4Tel |
| Model | Call4Tel FXO (4/8/16) |
| Number of Physical PSTN Ports on device | (Based on current set up) |
| Main Trunk No | (Based on existing PSTN Number) |
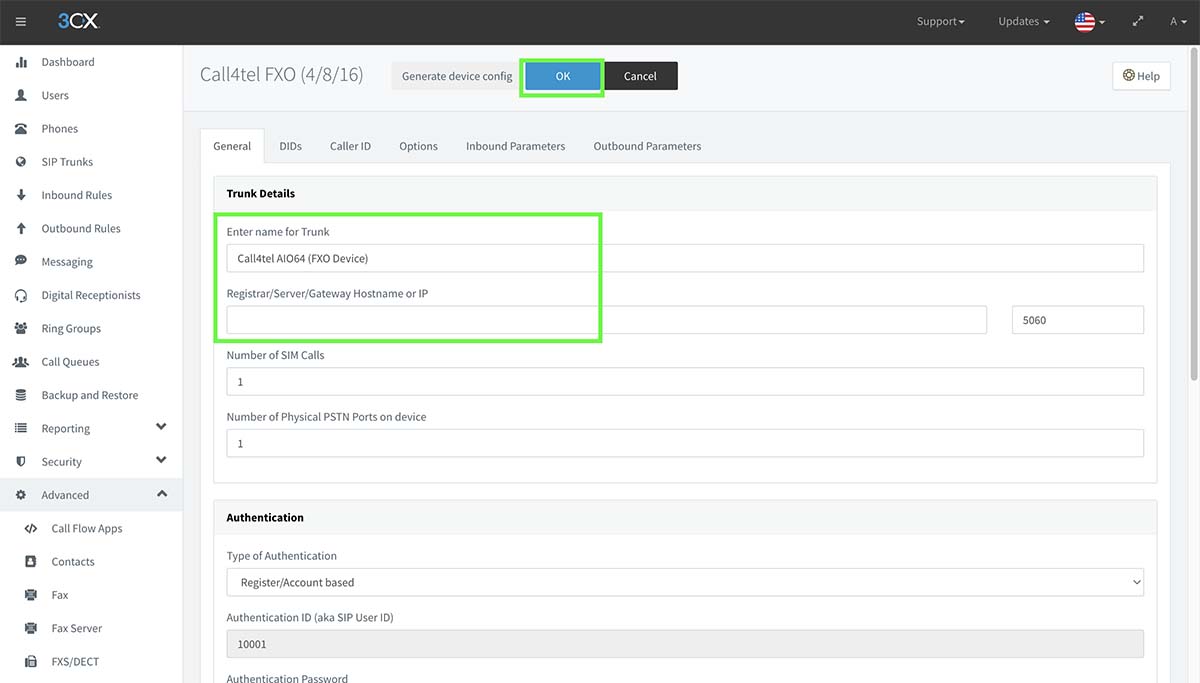 Enter the Name for Trunk based on own preference
Note: For Registrar / Server/ Gateway Hostname or IP – Input Gateway IP address configured in Step 3 and click on Ok to confirm.
Enter the Name for Trunk based on own preference
Note: For Registrar / Server/ Gateway Hostname or IP – Input Gateway IP address configured in Step 3 and click on Ok to confirm.
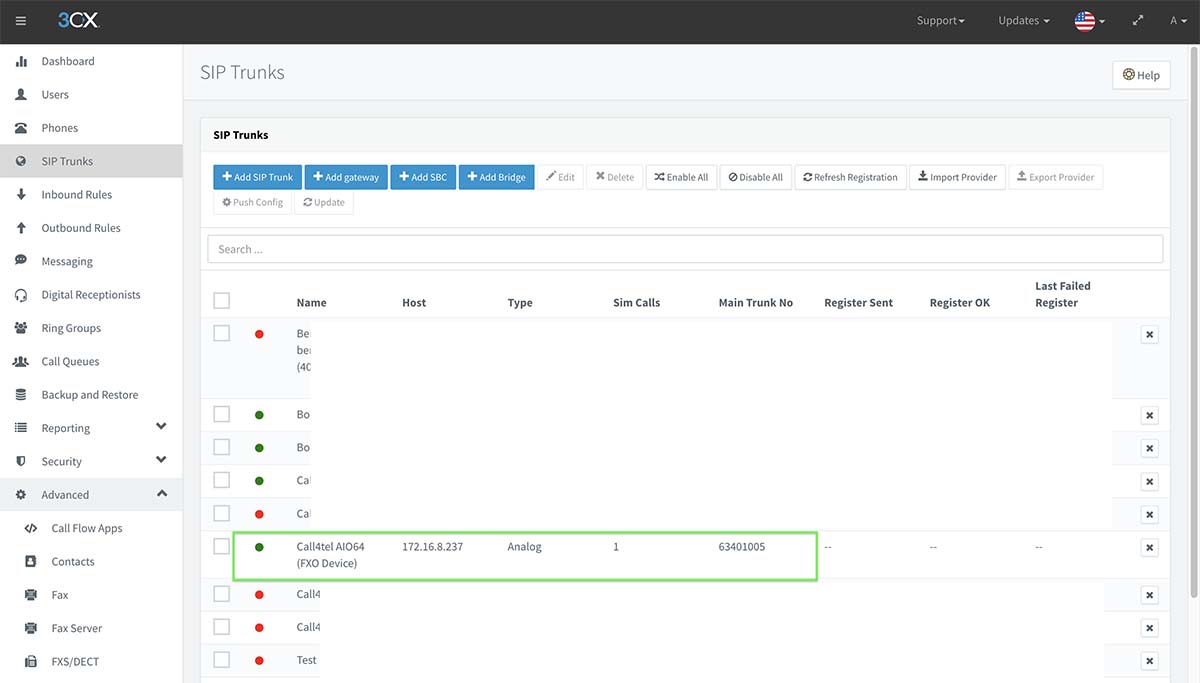
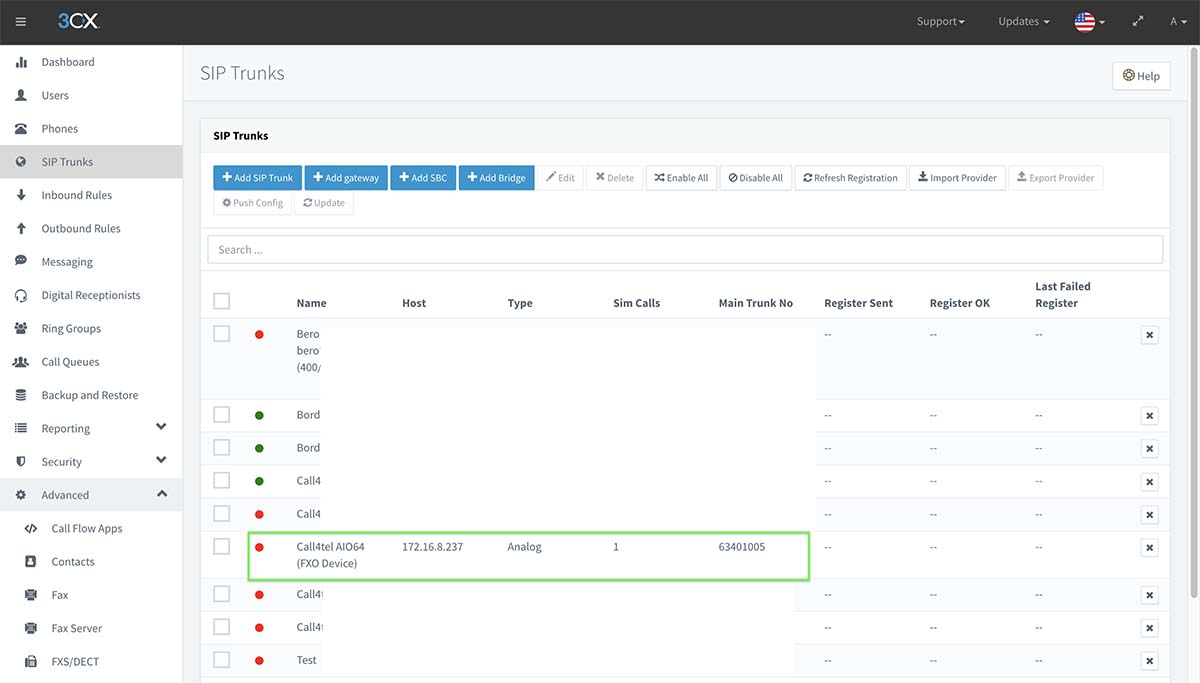 The device has been added to the management console with the red (inactive) status.
Click on the device once again. The below screen will appear.
The device has been added to the management console with the red (inactive) status.
Click on the device once again. The below screen will appear.
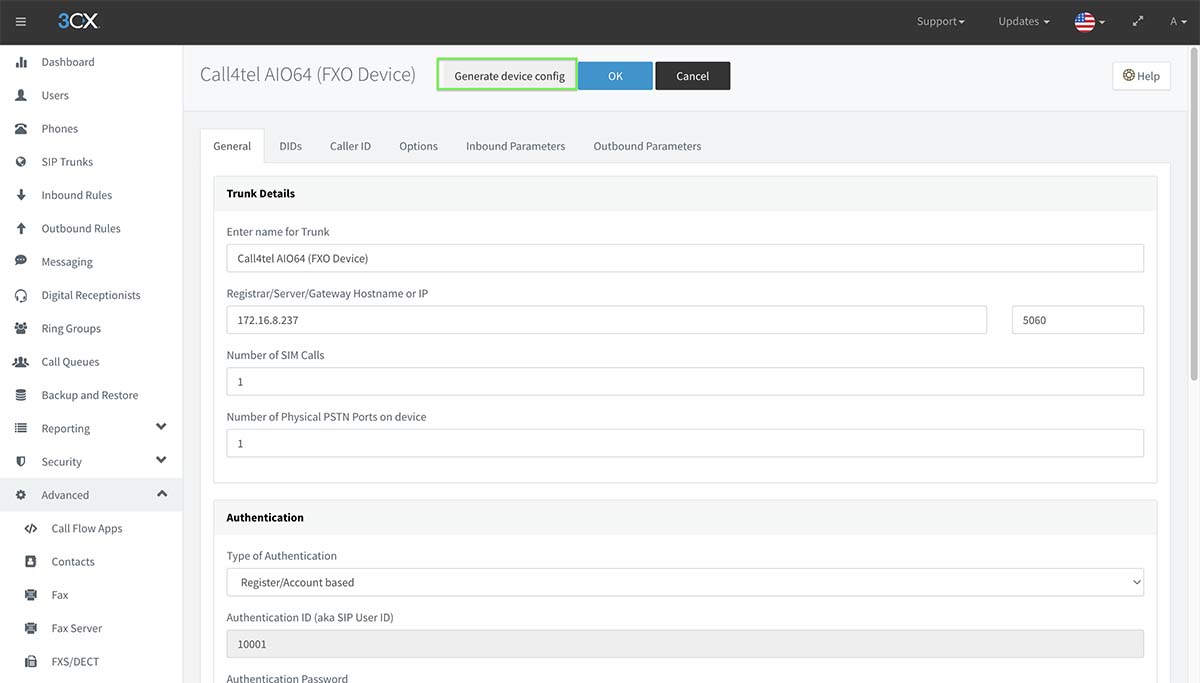 “Generate device config” will direct to Call4Tel portal shown below. If it is not directed, the portal can be reached via following URL http://IP/Wizard,
eg: http://172.16.8.237/Wizard (Gateway IP address configured in Step 3)
“Generate device config” will direct to Call4Tel portal shown below. If it is not directed, the portal can be reached via following URL http://IP/Wizard,
eg: http://172.16.8.237/Wizard (Gateway IP address configured in Step 3) Step 6: Configuring FXO & FXS in Call4Tel Portal

Login Credentials
Username: root
Password: 3cx
PBX Address
Once you enter the credentials you will be prompted to enter the PBX Address and Port.
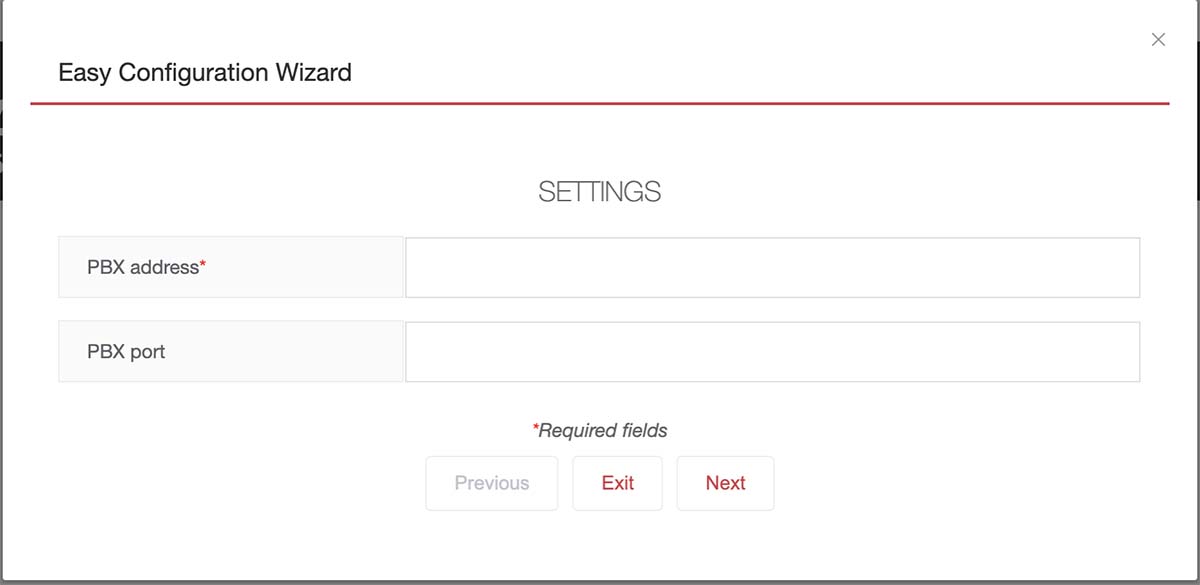
PBX Address: Based on the IP address configured in Step 4
PBX Port : 5060
Click on “Next” to proceed to next step
FXO Configuration
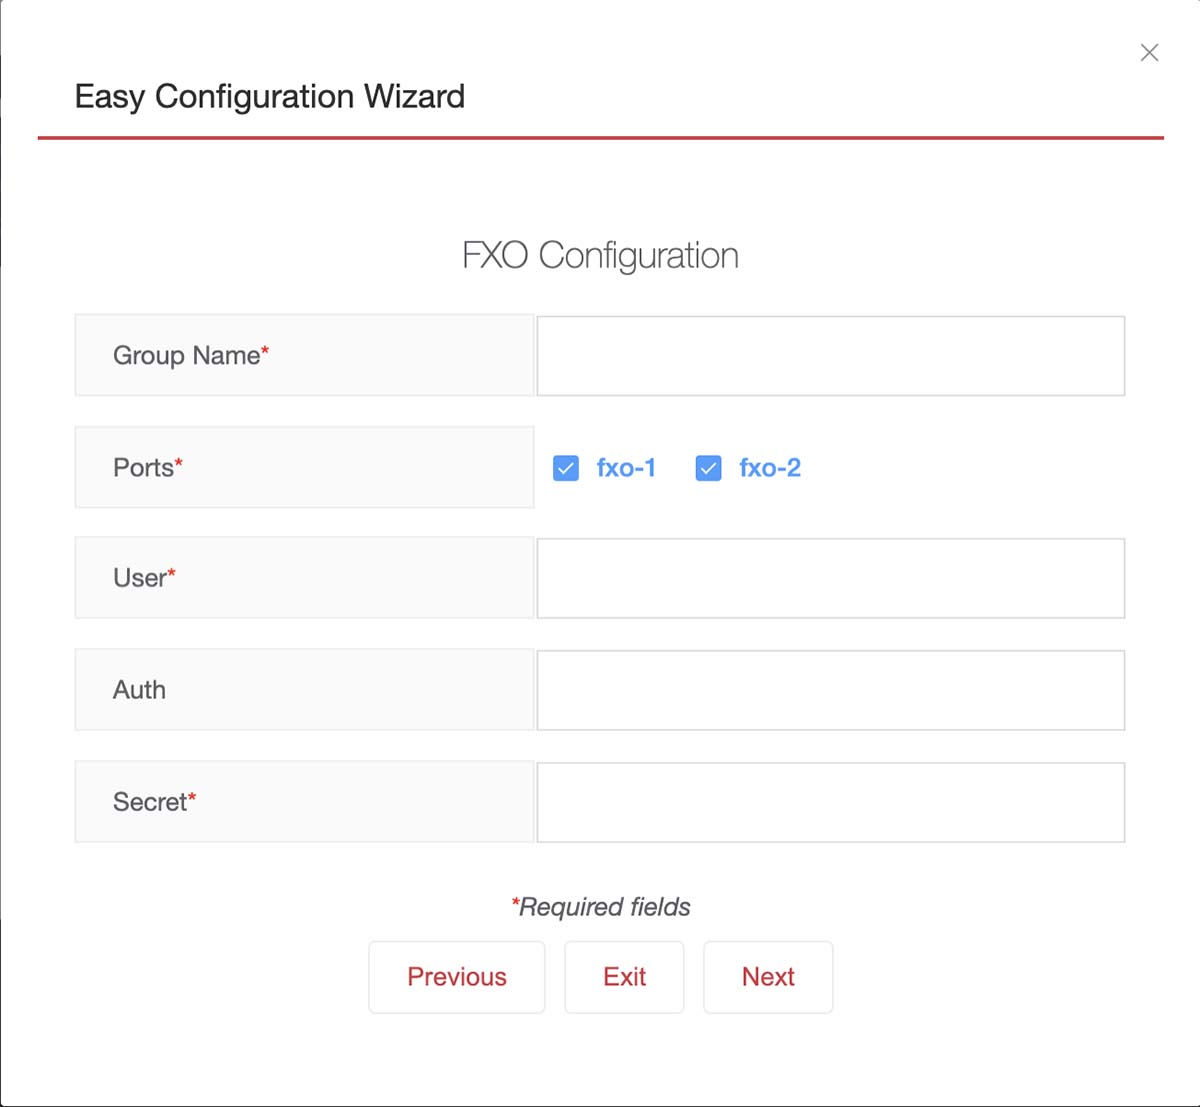
Enter the all the mandatory field highlighted in *.
| Group Name | Based on own preference |
| Ports | No of ports to be configured as FXO |
| User | Generated from 3CX management console |
| Auth | Generated from 3CX management console |
| Secret | Generated from 3CX management console |
Generating User and Secret Credentials from the 3CX Management Console
Login to the 3CX Management console –> SIP Trunk –> Select the Gateway (Added in Step 5)
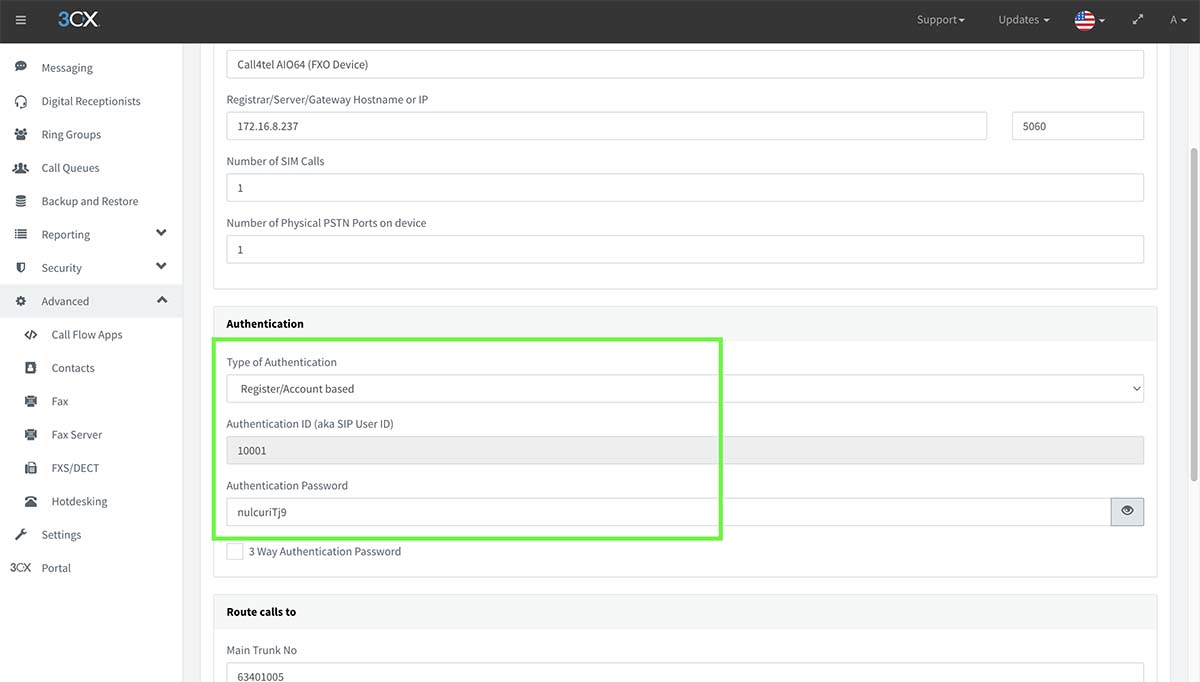
The Authentication ID will be used to enter “User” and “Auth” Field in FXO Configuration.
Authentication Password details to be input as “Secret”.
Upon completing all fields in the FXO Configuration, click on “Next” to FXS Configuration.
FXS Configuration
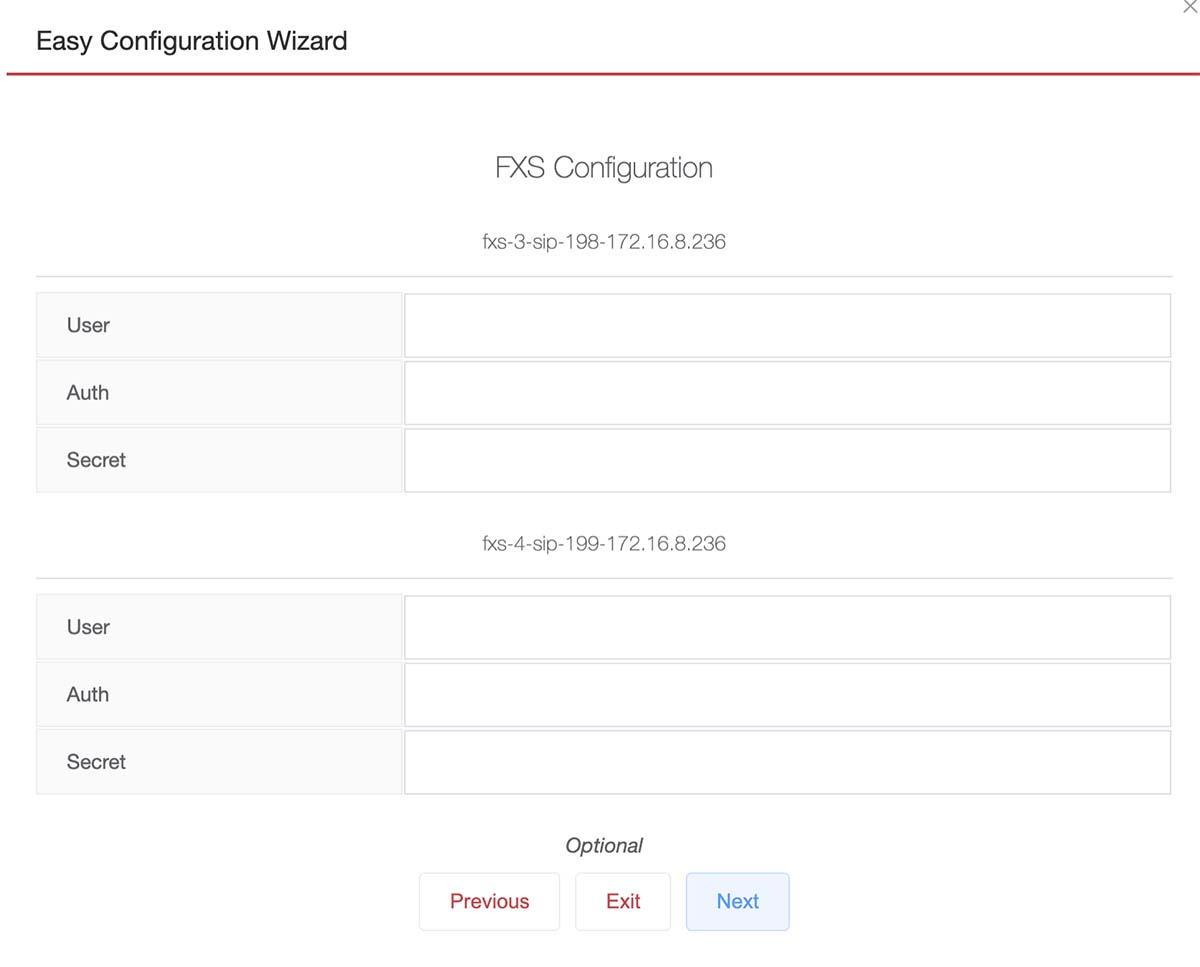
Enter the extension details in “User” Field and click on “Next”
Configuration Summary
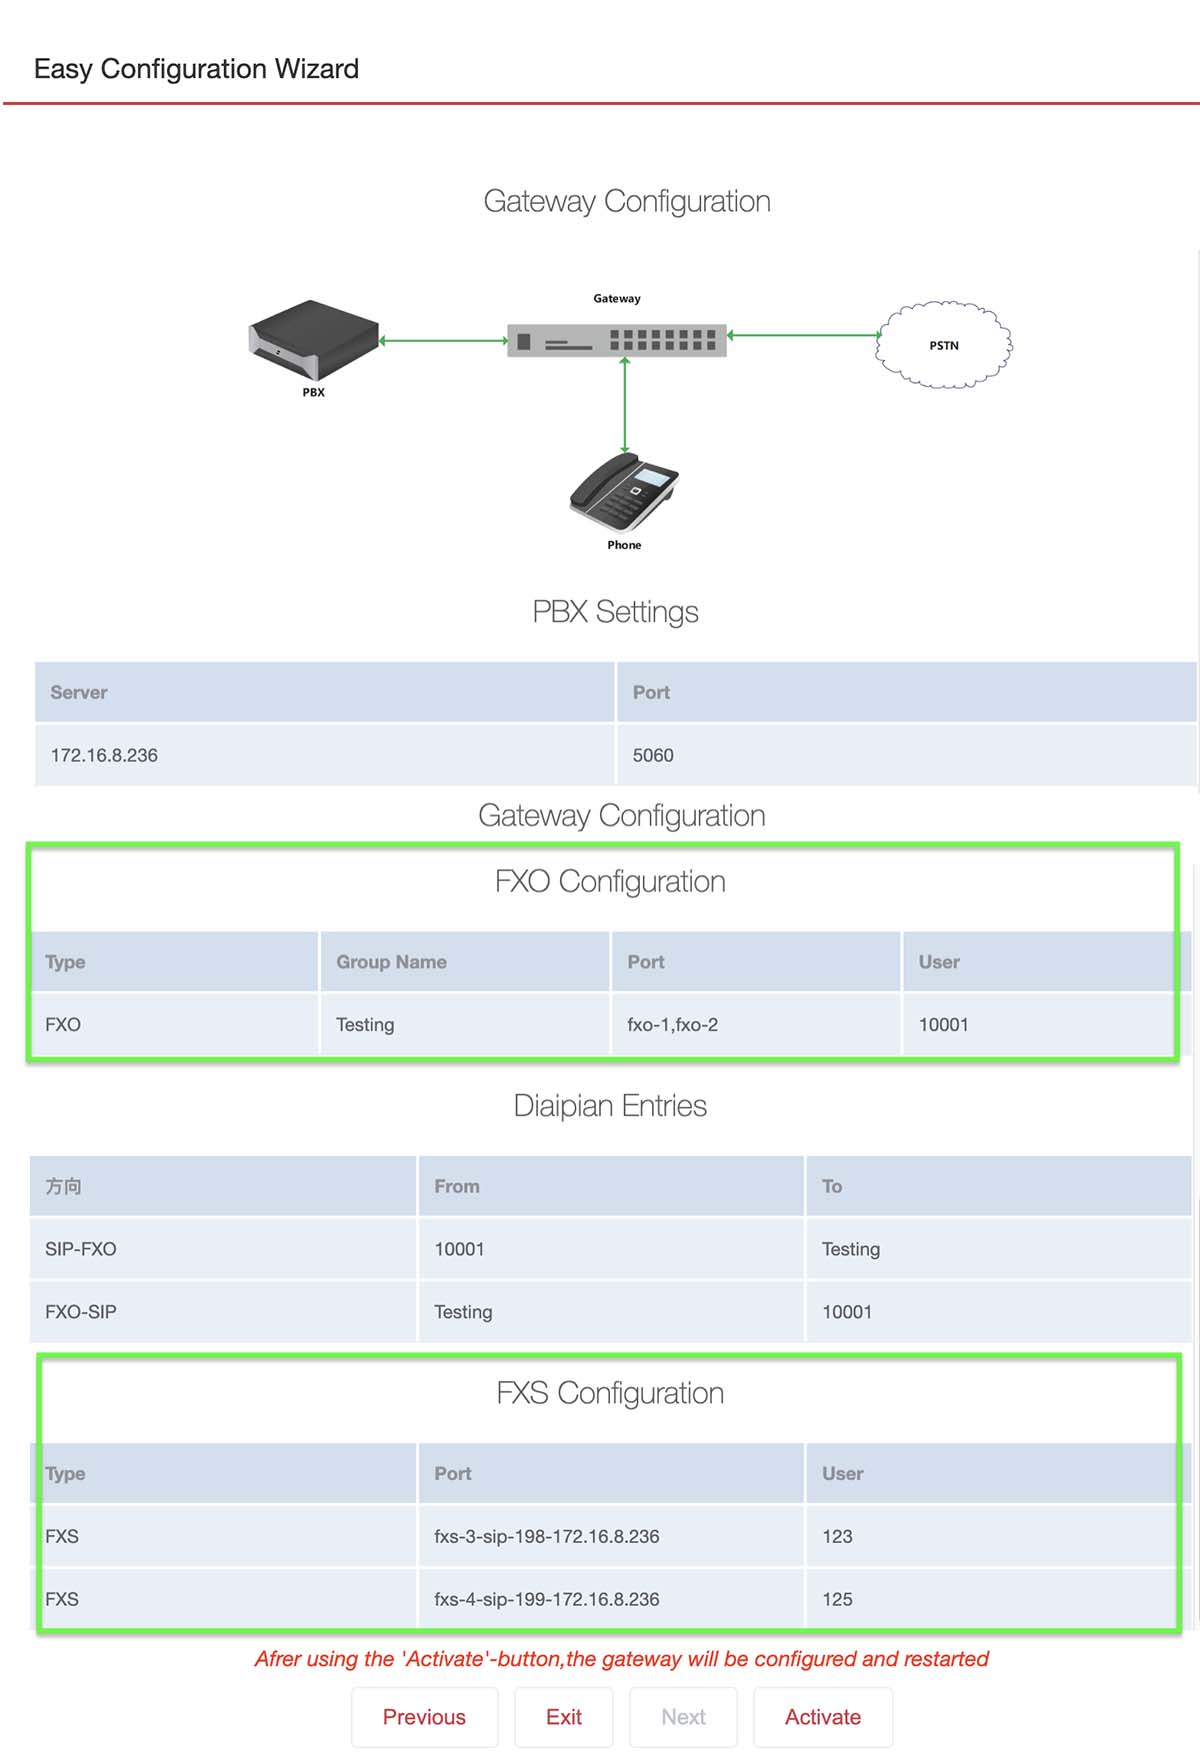
The configuration summary on the FXO and FXS will be shown as per above.
Click on “Activate” to finalize the configuration. Successful configuration message will be prompted.
Step 7: 3CX Registration Verification
Login to the 3CX management console –> SIP Trunk
Device status is now Green and Active