Device Configuration
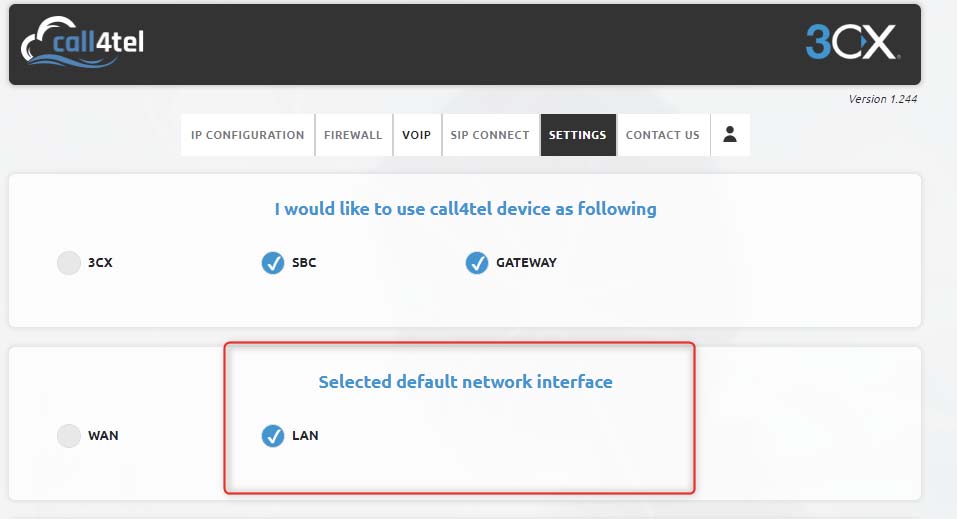
WAN will be used to connect the local LAN network to communicate with the 3CX server or 3CX SBC. LAN is needed to set the static local IP address.
LAN will be used to connect the TM MPLS line which will come from TM. The LAN interface will obtain the IP address from the TM DHCP server.
Ensure the default trunk is selected to LAN on the Settings page
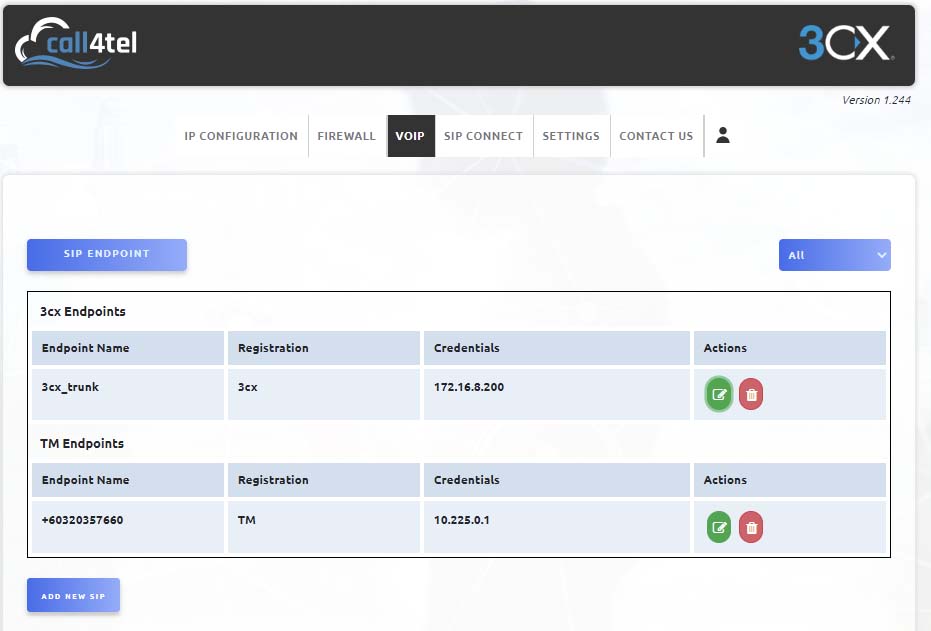
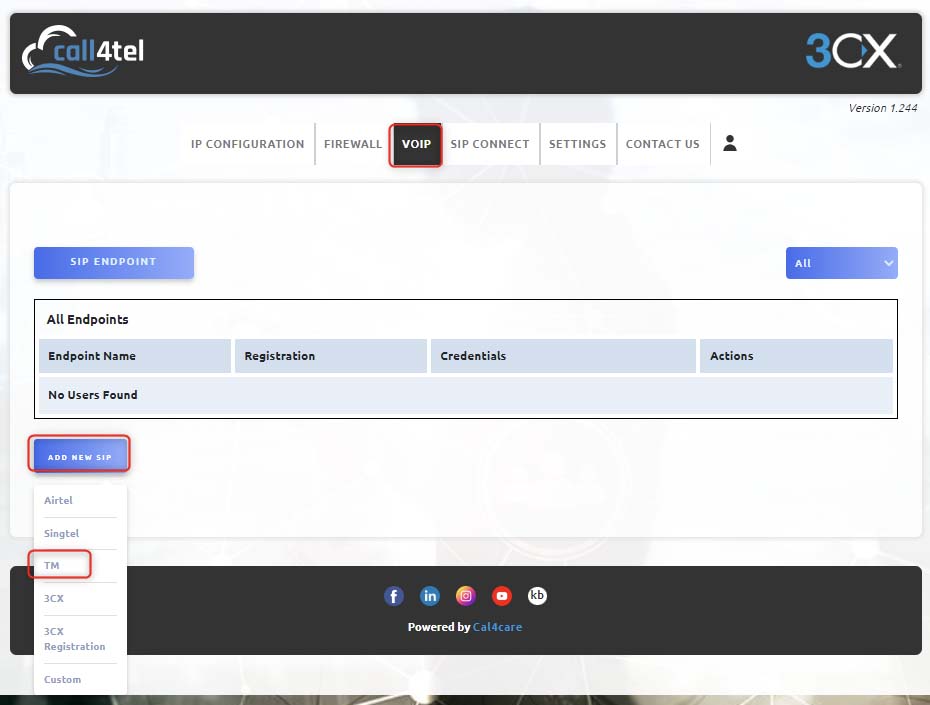
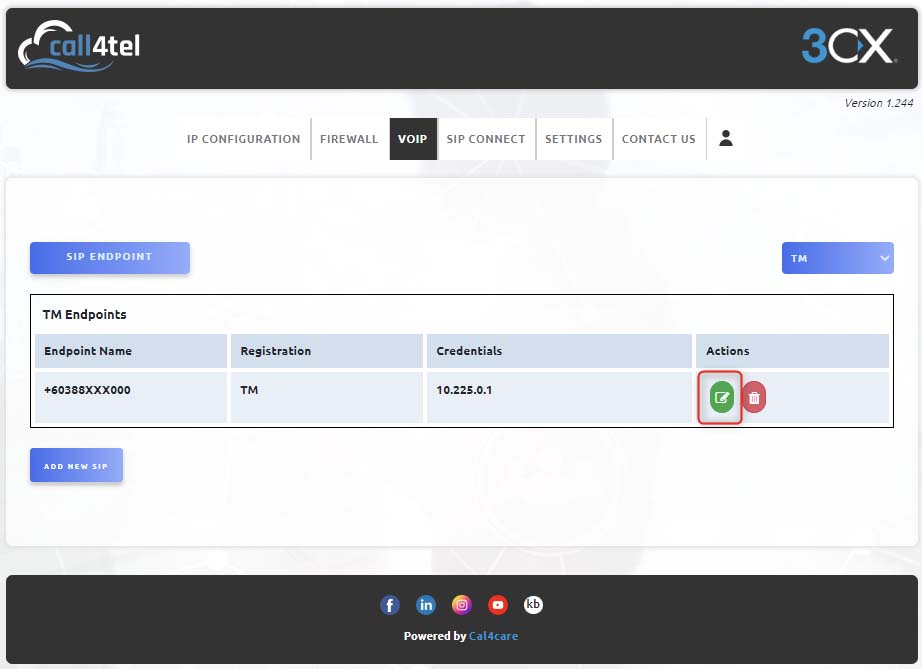
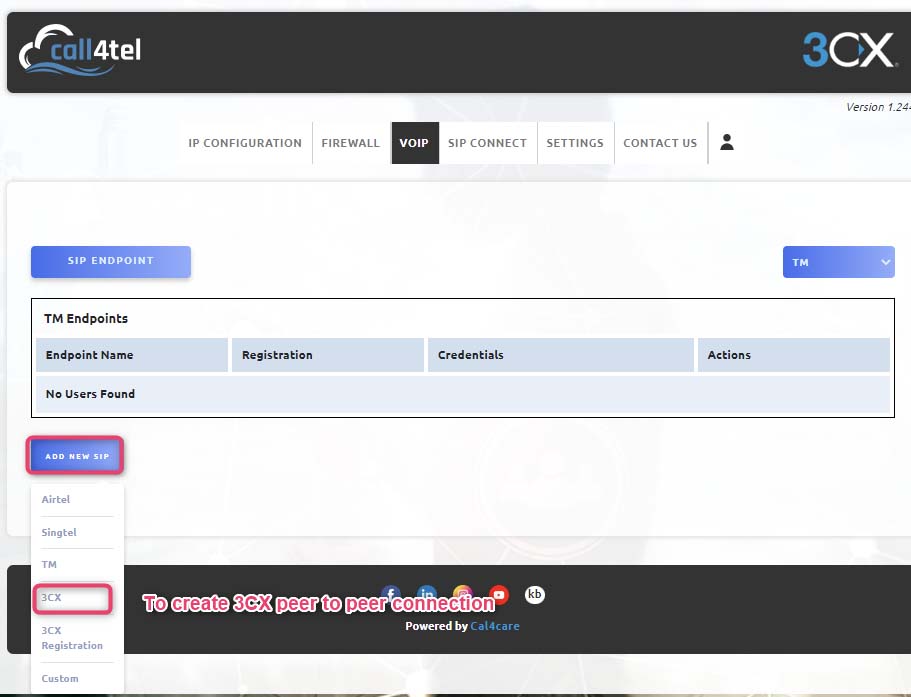
To create the TM Trunk, open the Call4tel portal using IP address:5448 navigate to VoIP, Add New SIP endpoint and select TM.
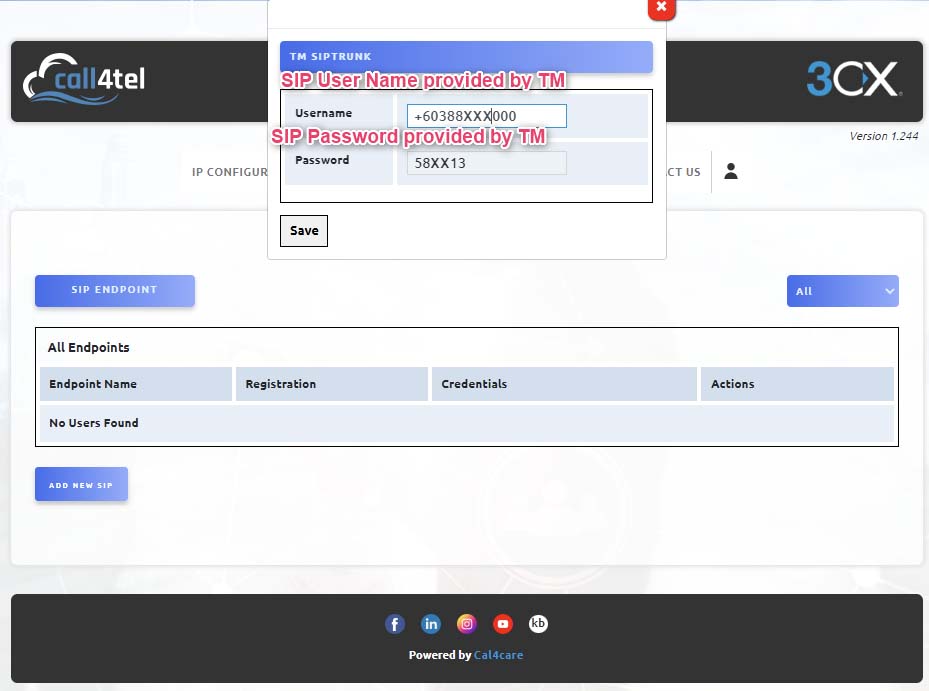
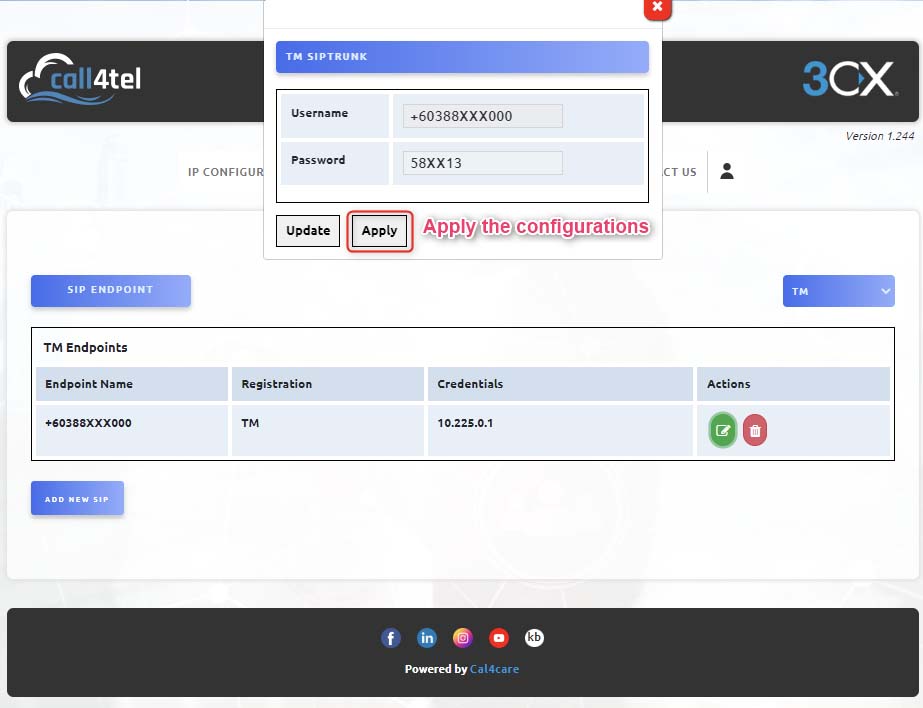
A pop up will appear prompting you to enter TM user name and password. The details will be provided by TM. Enter the details and click Save.
To apply the configuration, edit the TM Trunk by clicking on the green button as shown above and click on apply to save the configuration, as shown below.
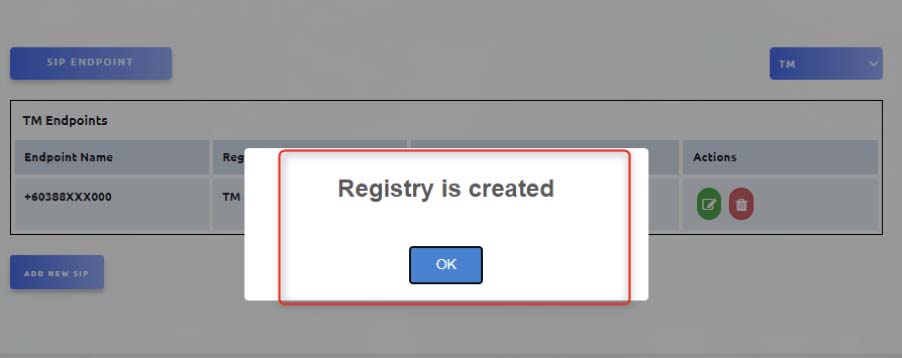
A pop up will appear informing you that the Registration is completed successfully. Click ok.
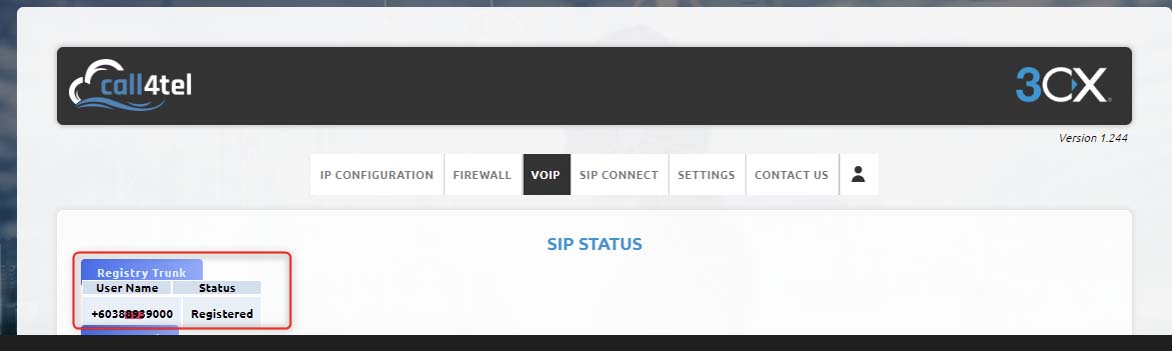
Check the trunk status by going to VoIP> SIP Status.

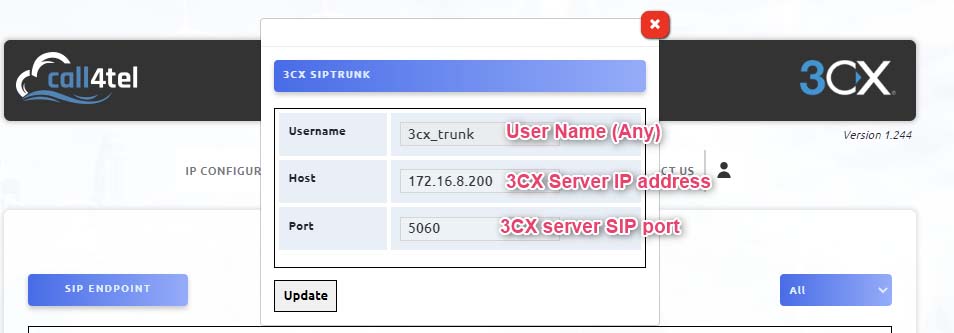
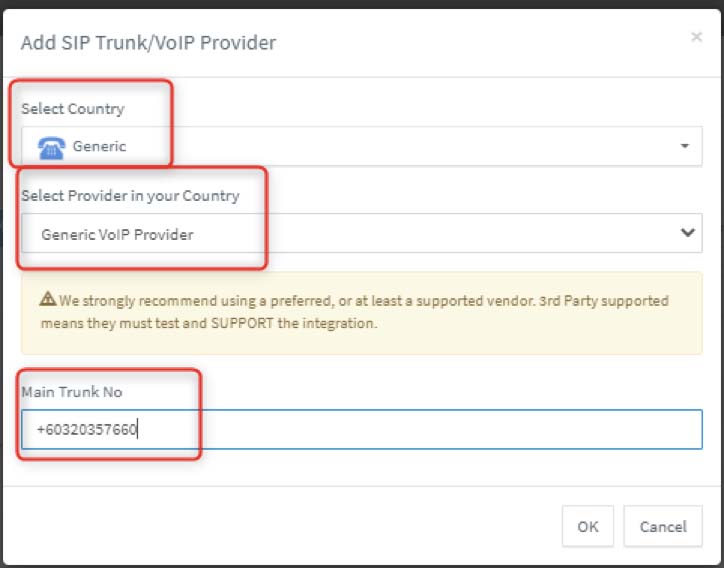
Now you need to configure the 3CX SIP trunk with your NX32 Gateway using peer to peer connections (Applicable only with 3CX & NX32 VoIP Gateway in same location or VPN connections).
Enter the required details
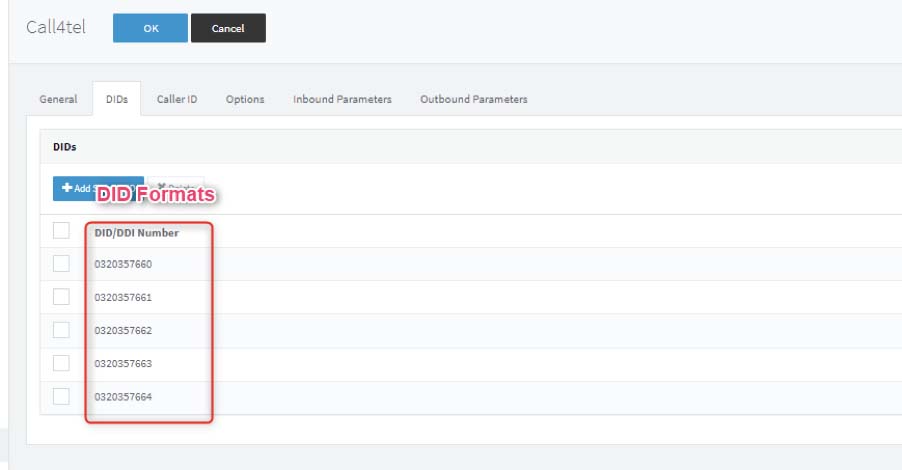
Once the trunk is created you will see both the trunk and the SIP end points.
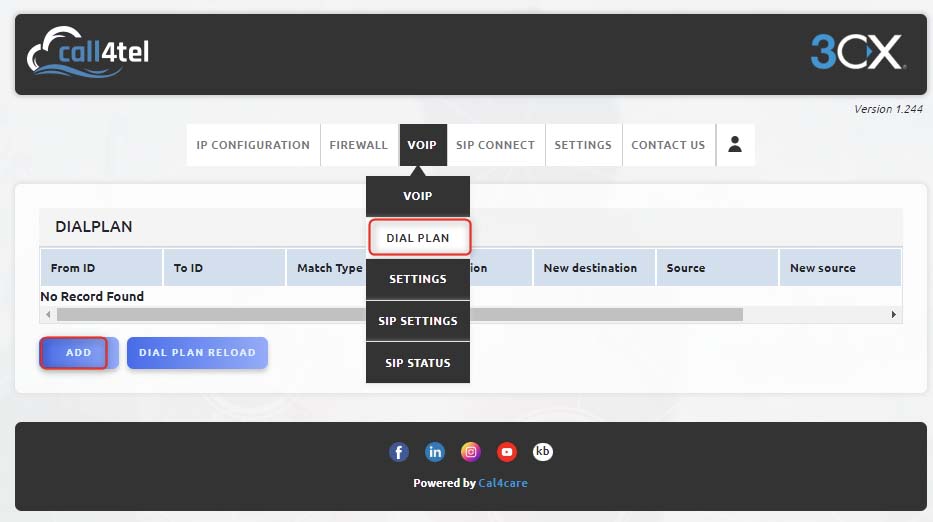
Create a Dial Plan
Now you need to configure a dial plan to route your calls. Go to your Call4tel portal> VoIP> Dial Plan.
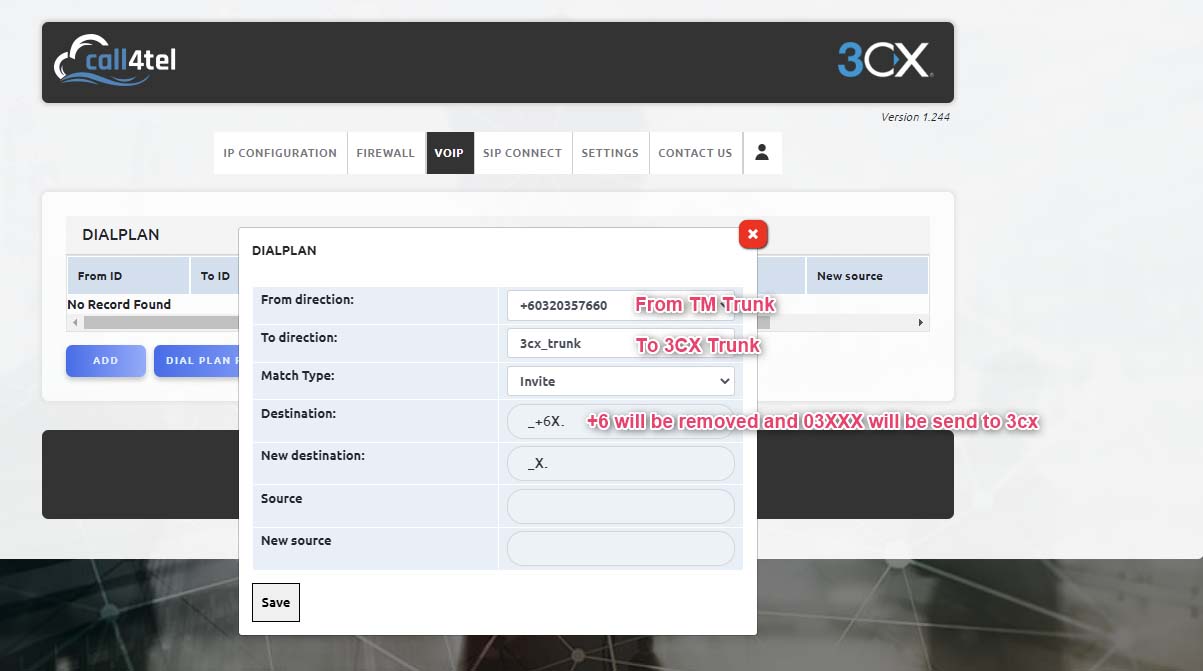
From TM the incoming calls begin with +60XXXXXXXXX so we will use +6 as the prefix to route the calls.
+6 will be removed when it reaches the 3CX server. If you need to receive +6XXXX on 3CX just use dial plan “_X.” on destination
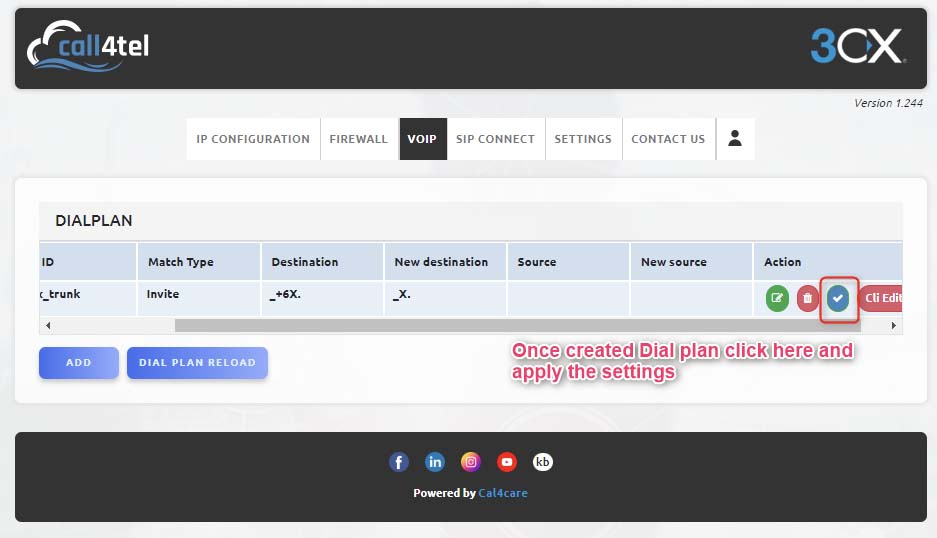
Once the dial plan is created you must apply your configuration otherwise the settings will not come into affect.
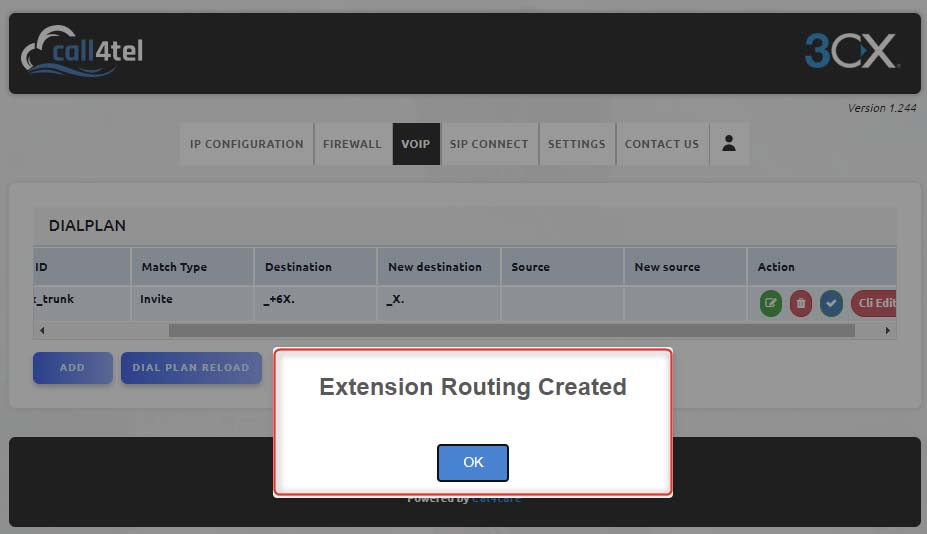
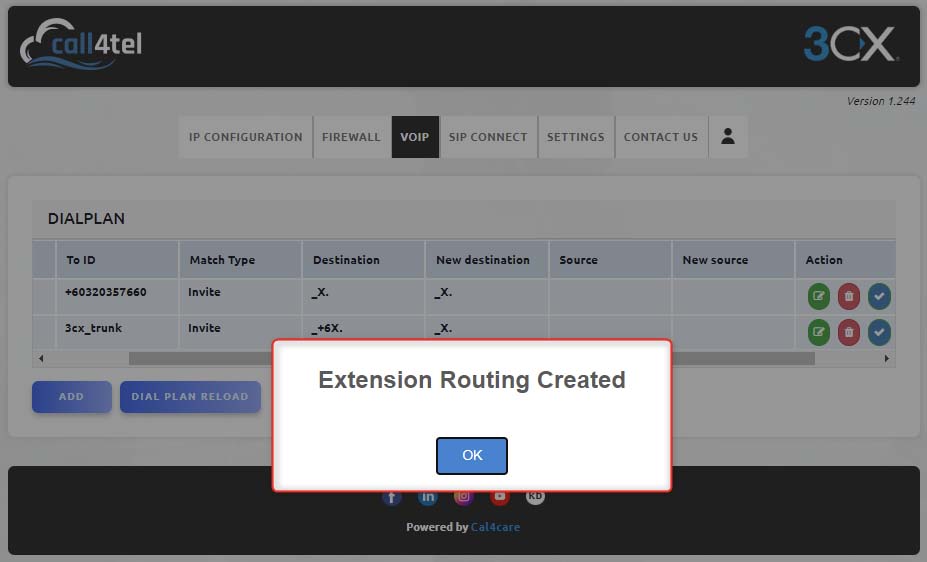
The above scree is confirmation that the routing was successfully created.
Create Dial Plan 3CX to TM Trunk
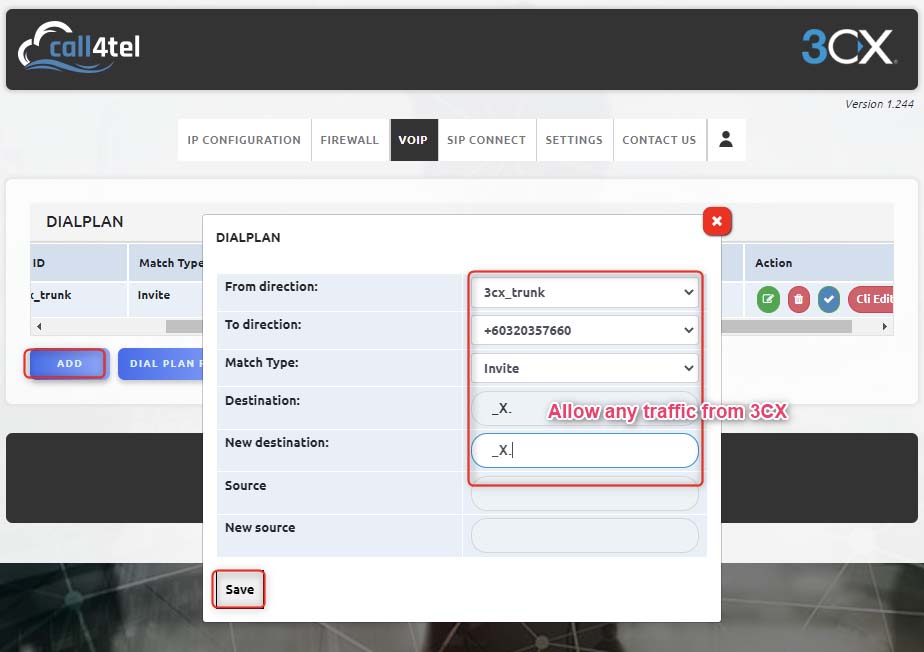
Click save as shown above and then click the apply button activate the configuration
Create Peer Trunk on 3CX

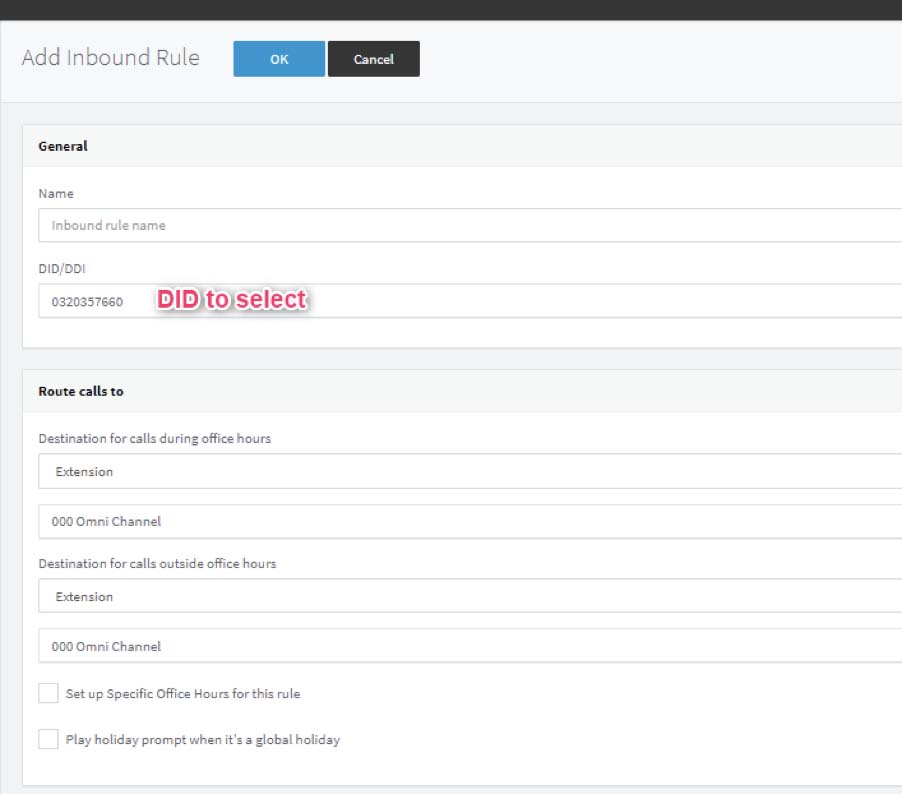
Inbound Rules
Outbound Rules
